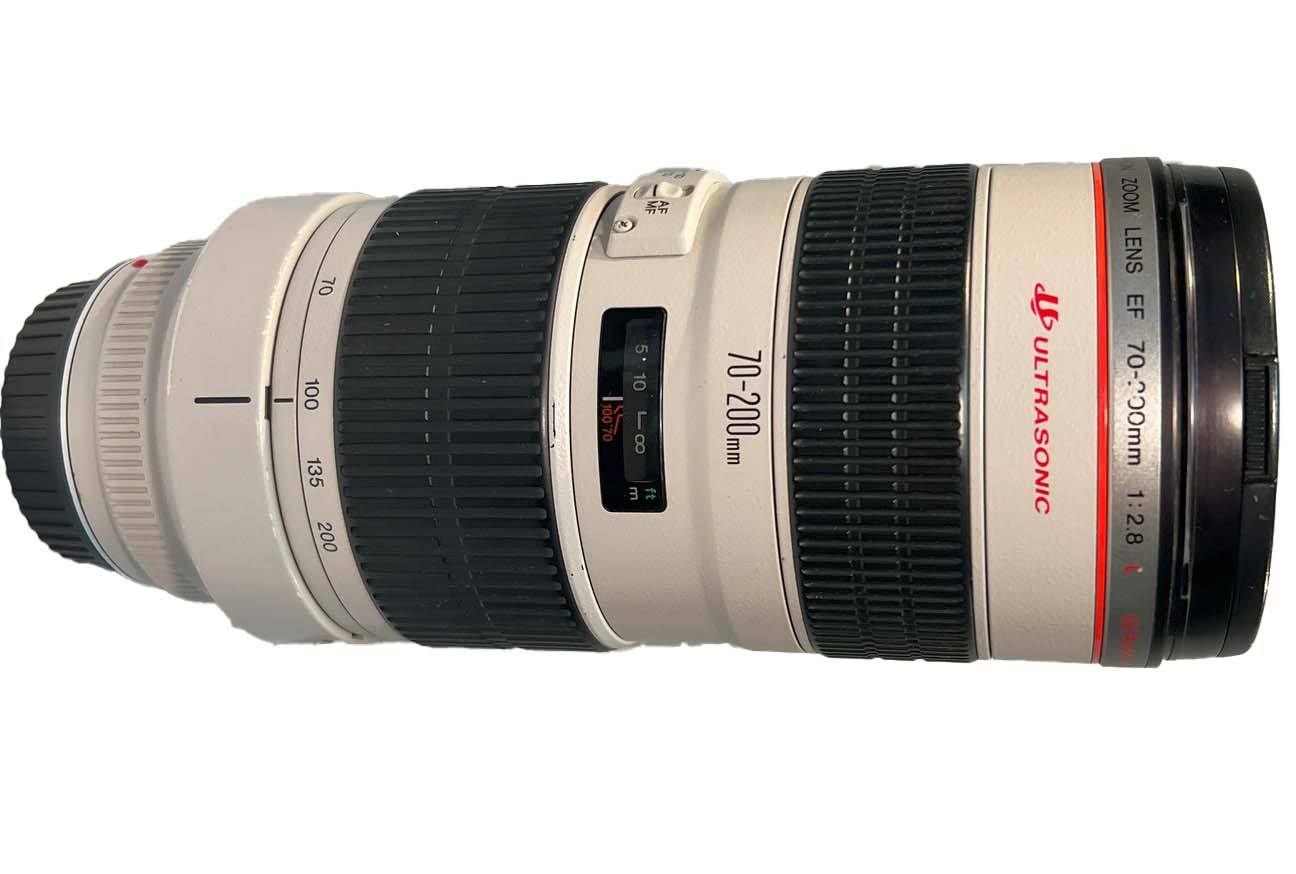
私は、CANONレンズ EF70-200 f2.8Lを20年強使用しています。これは、空気感を映し出すことの出来る非常に優れたレンズであり、ボケの味わいも実に素敵な手放せないレンズです。レンズ自体は非常に頑丈で重い造りなのだが、ここ数年の間にピントを合わせる鏡筒付近がグラつき始め、今年になって一層症状が悪化してきたことから、思い切って分解メンテナンスをやってみようとトライしました。

どのような症状か?
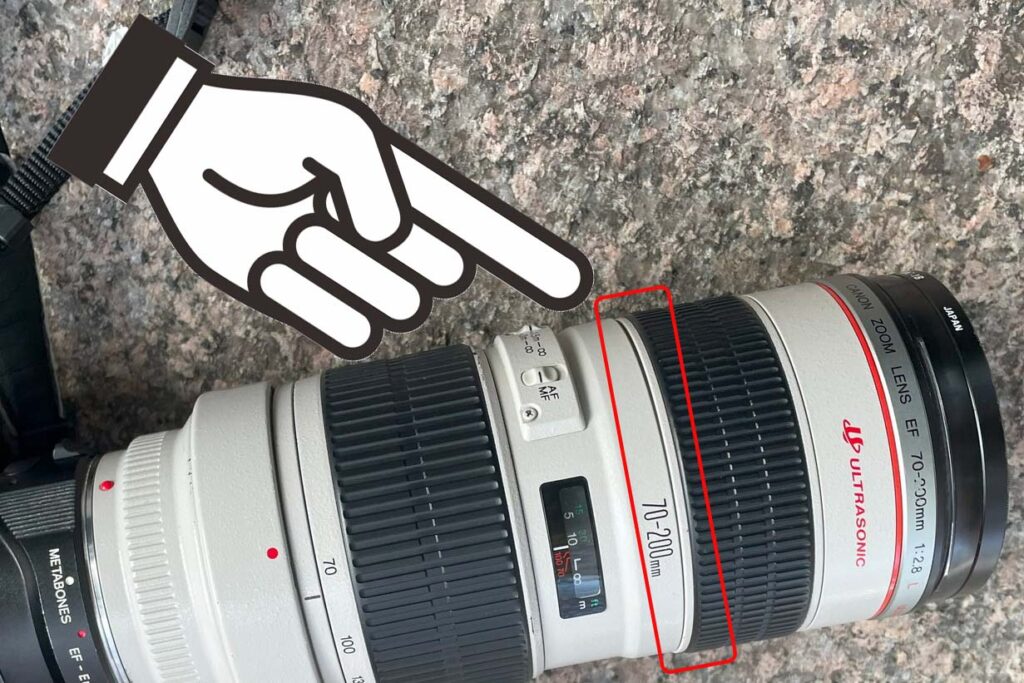
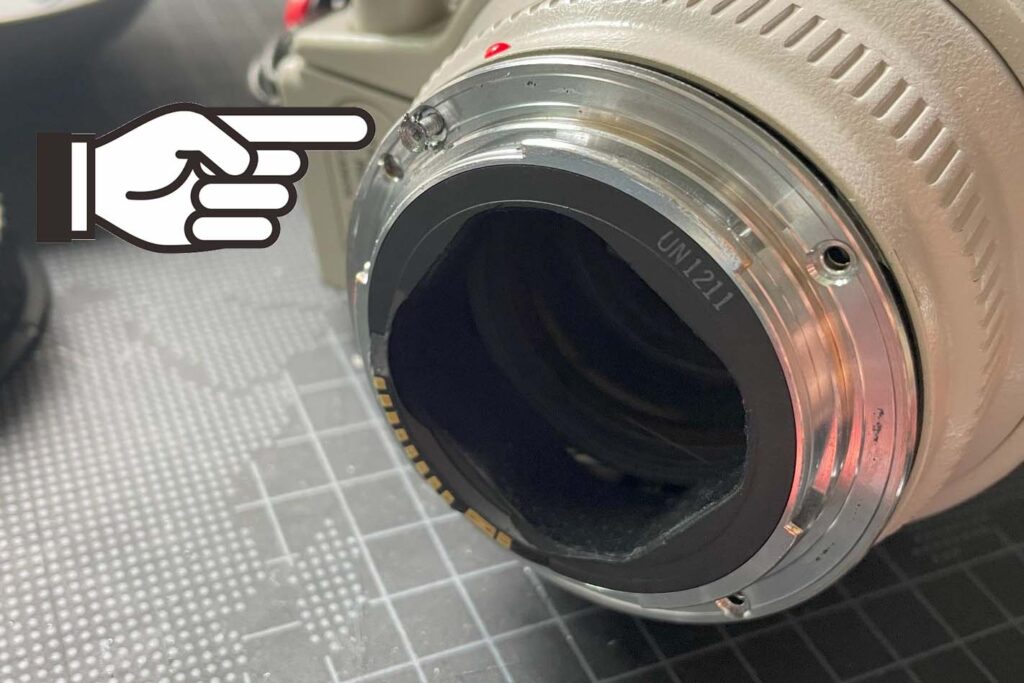
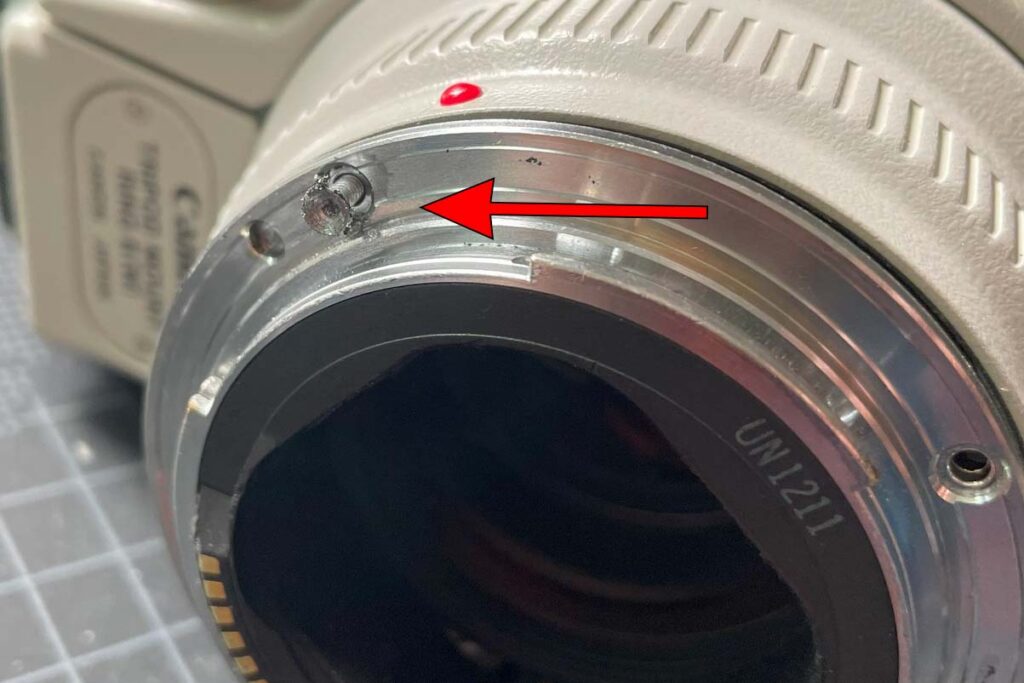
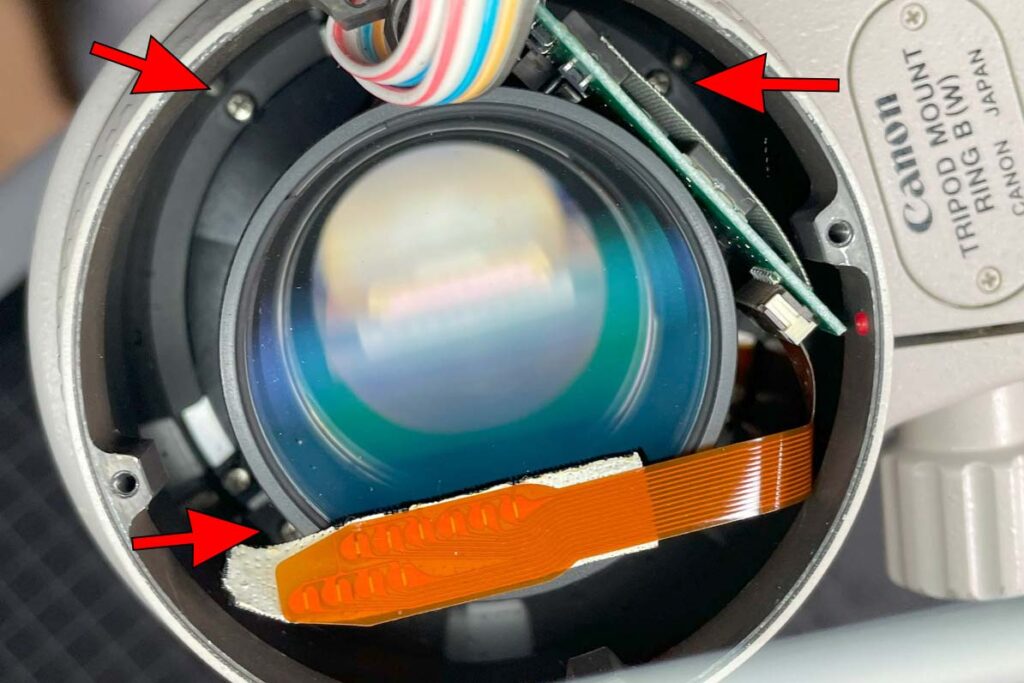
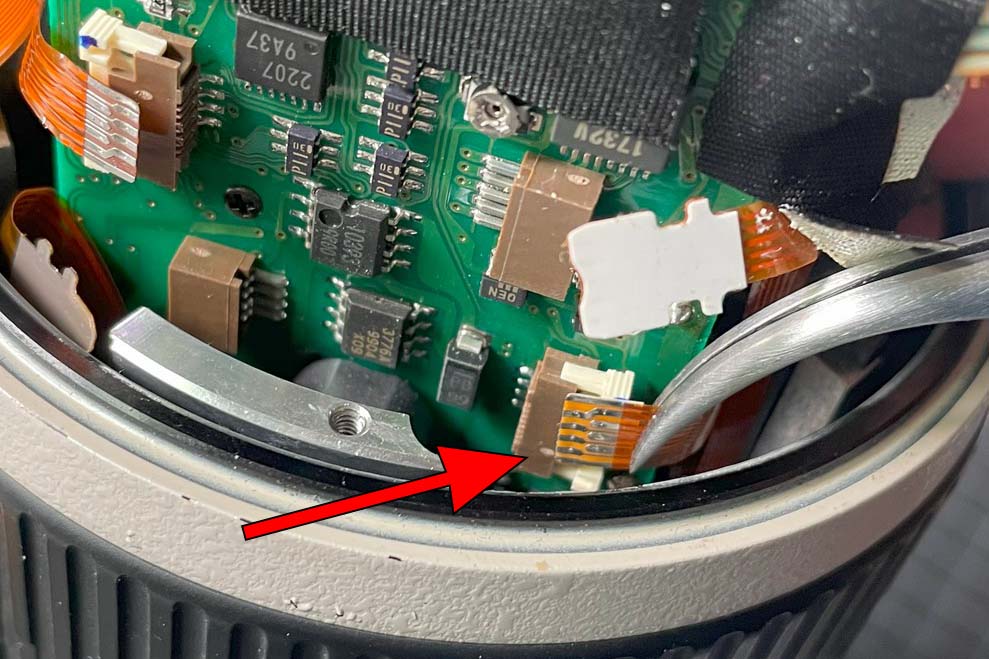
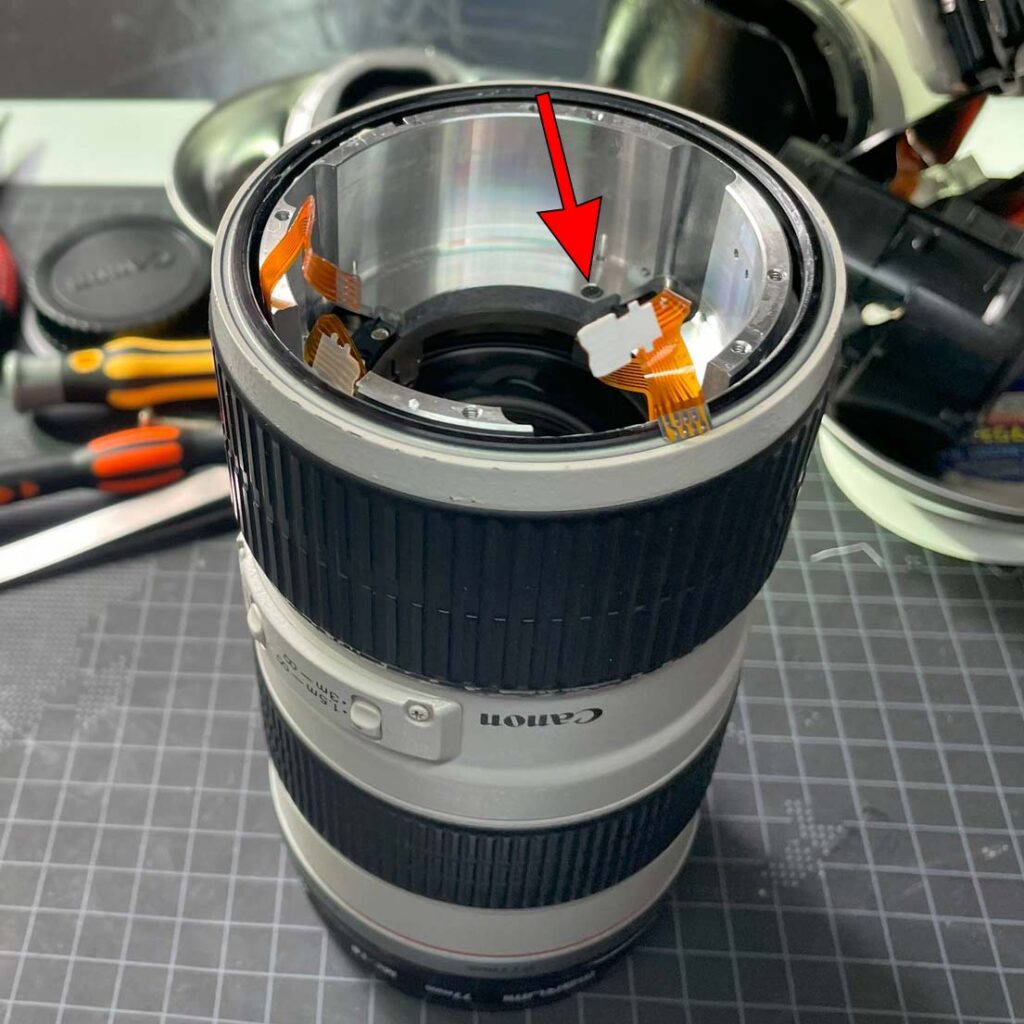
写真の指差し部分に隙間が見えるが、これが最大0.6~8㎜程間隔が空くほどになってしまった。
ピント合わせの時に、かなりグラついてピント自体も甘くなってしまうのが致命的だった。もちろん手前に引いて固定するように使用すれば何とかなる場合もあったのだが、相当力を入れてカメラを構えないといけないのが辛い。また、カメラを肩にかけて歩いている時にレンズがカタカタ鳴るのは、どんどん症状が悪化しているようで問題だ。同じような問題を持つ方がネットで発信していないか探したのだが、なかなか見つからなかったが、ようやく同じ症状のための分解メンテナンスのブログを探し出せたので、それを参考に勇気を出してトライしたのだった。
分解スタート マウント部
この症状の解消のためには、鏡筒の外からでは無理であり、レンズの後端から外一つずつパーツを外す必要がある。
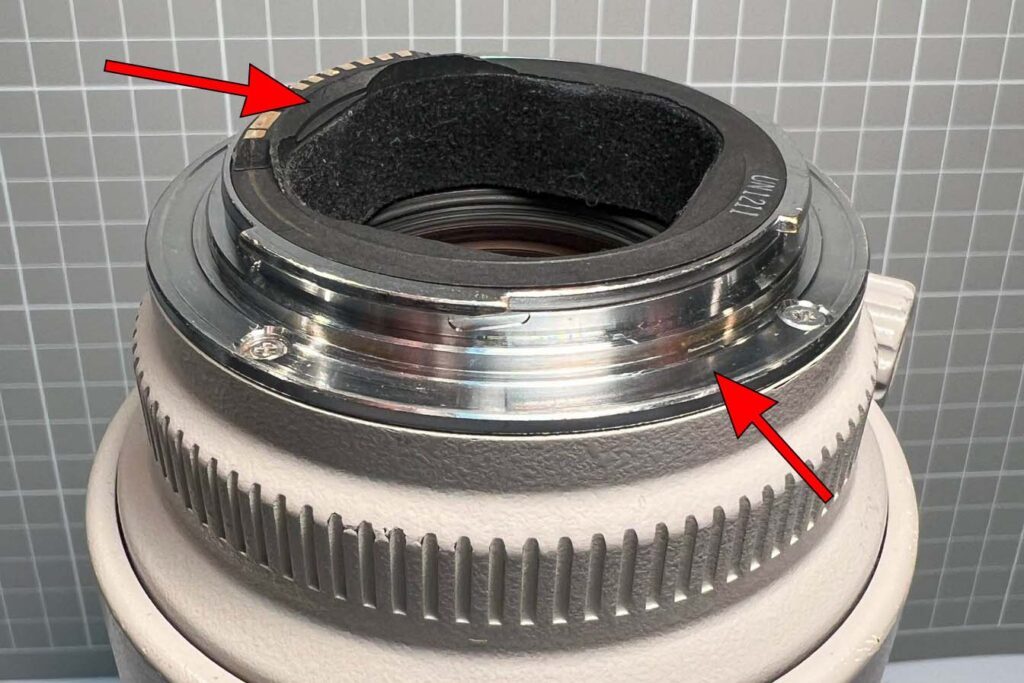
まずは写真赤矢印のマウント部を外すことからスタート。
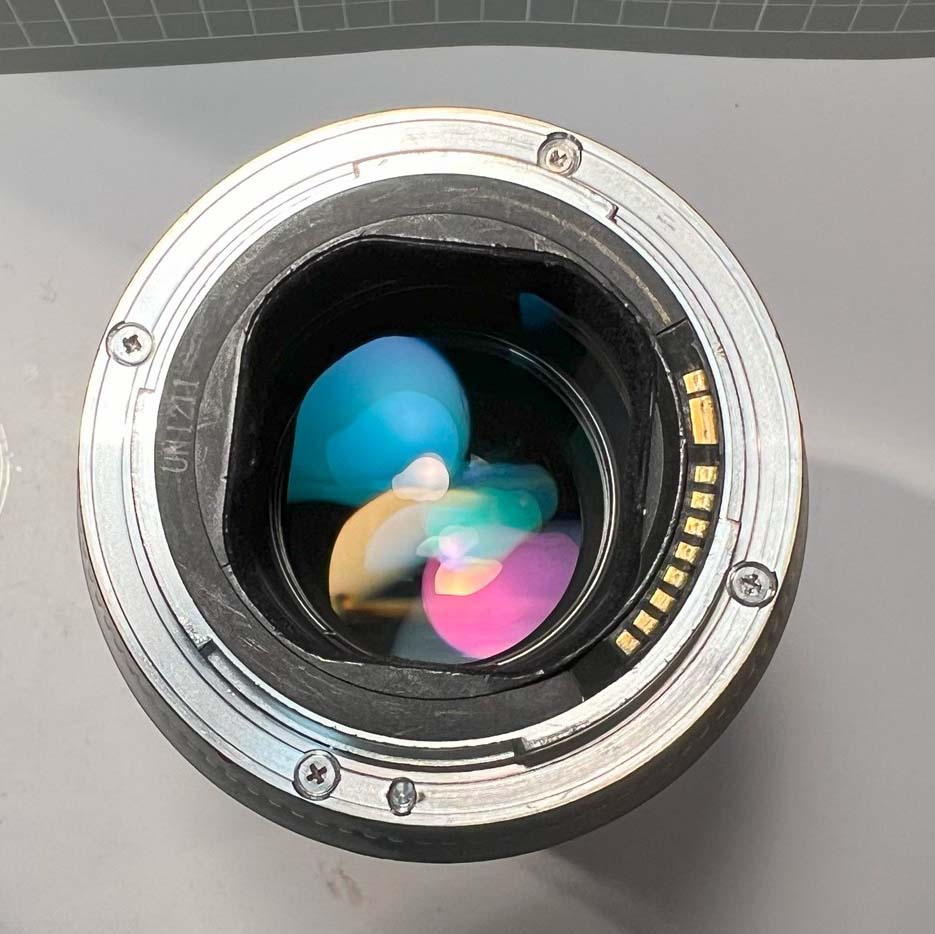
マウント部を外すには、4つの+ネジを外し、金属部の側面にある小さなネジを外して黒いパーツを外すようだ。
いきなりトラブル発生!
ここでいきなりトラブル発生! 動揺して撮影を忘れてしまう程だったが、マウントの金属部の4つの+ネジの一つを思い切りナメてしまったのだ。
やっぱり分解は無理かもと、弱気になってしまったが、お気に入りのレンズがここままでは許せないので、電動ドリルを出してきた。
狙いはドリルでネジの頭部を切り離し、ペンチでグルグル回してネジを外すこと。
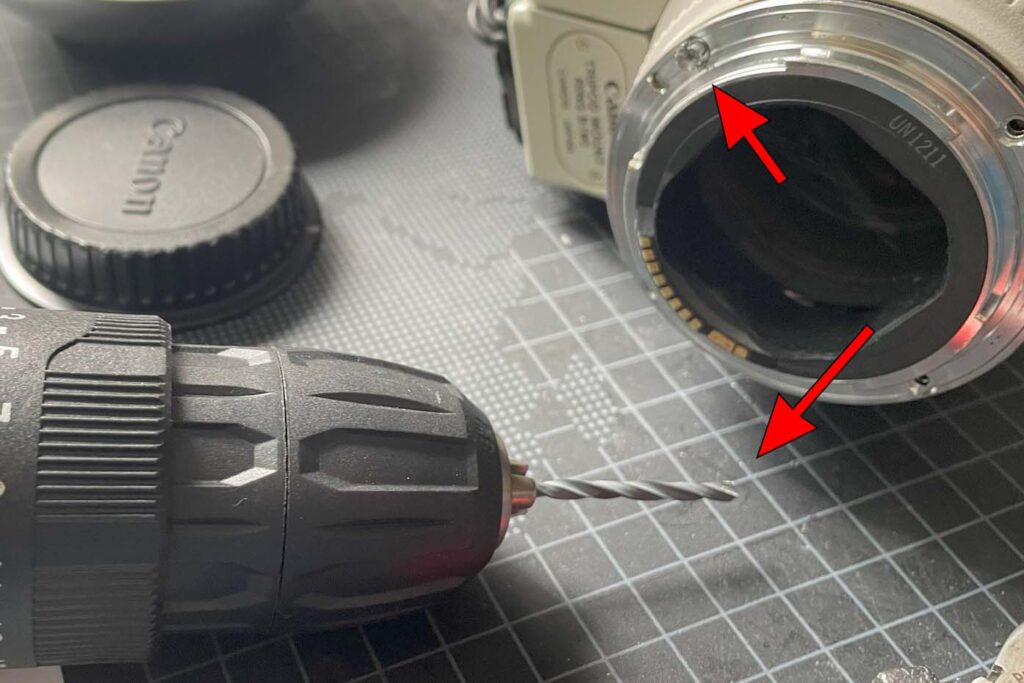
ネジのナメた凹みにドリルを強く押し込んでギュルルーと回し続けた。しばらくすると、良い感じで削れてきた感覚が出てきてこれならネジ頭部をうまく切り離せるかもと思った矢先、ネジ本体が動き始め、あっという間に外れた。ビックリと喜びが一気に押し寄せてきた。
これで何とかマウント部の金属を外すことができた。替えのネジは、後でホームセンターにて購入した。
マウント部分解
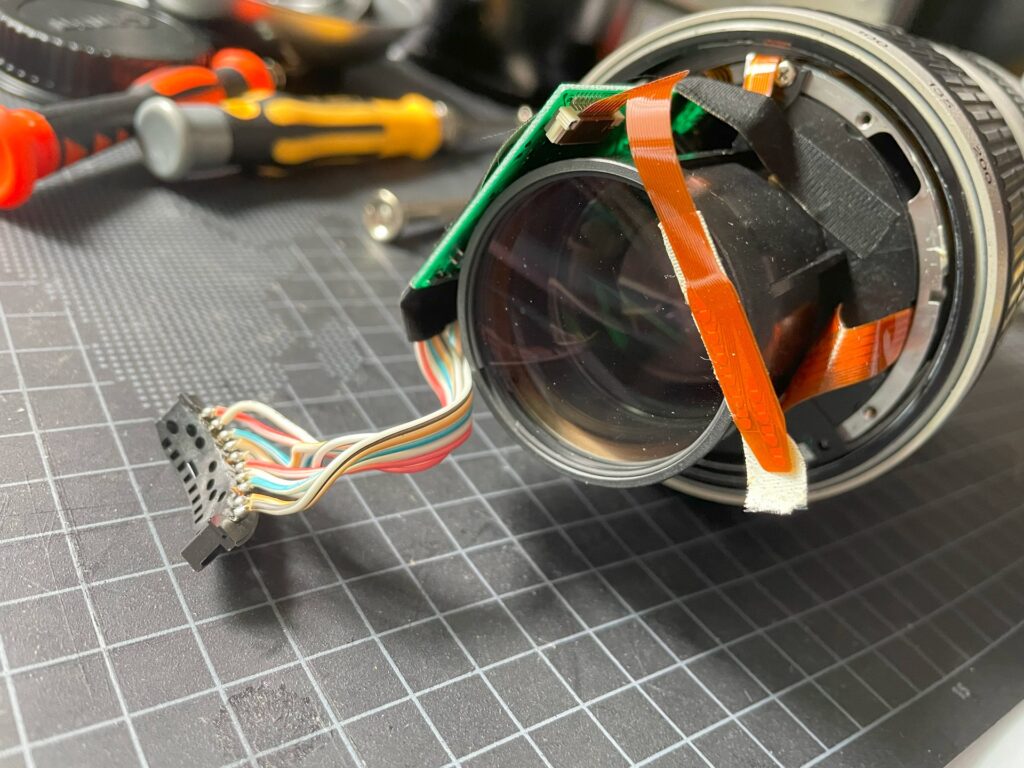
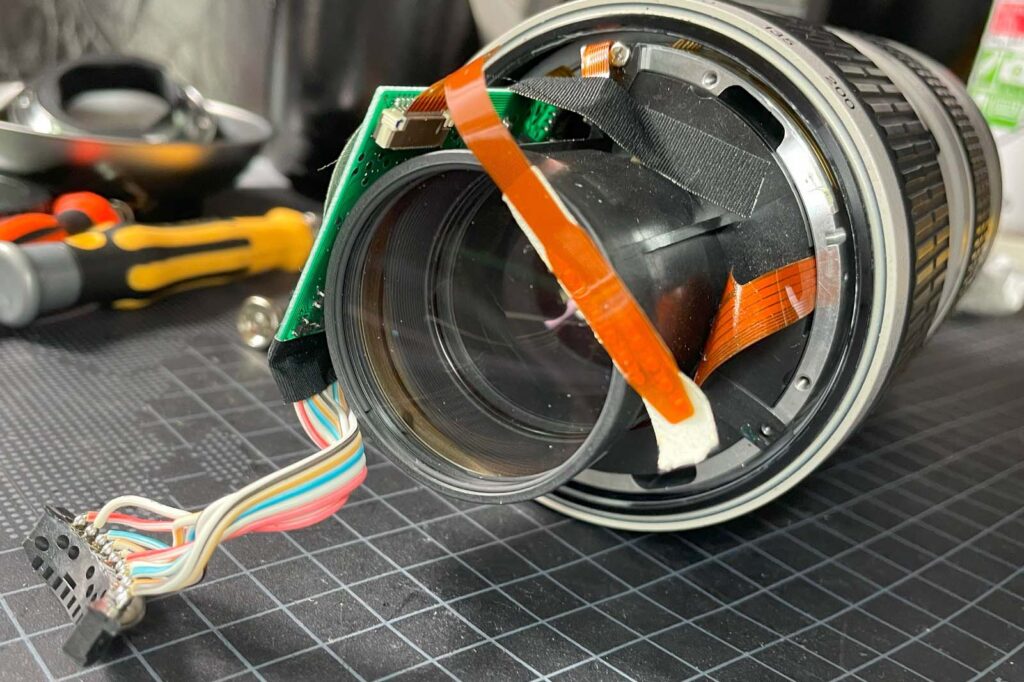
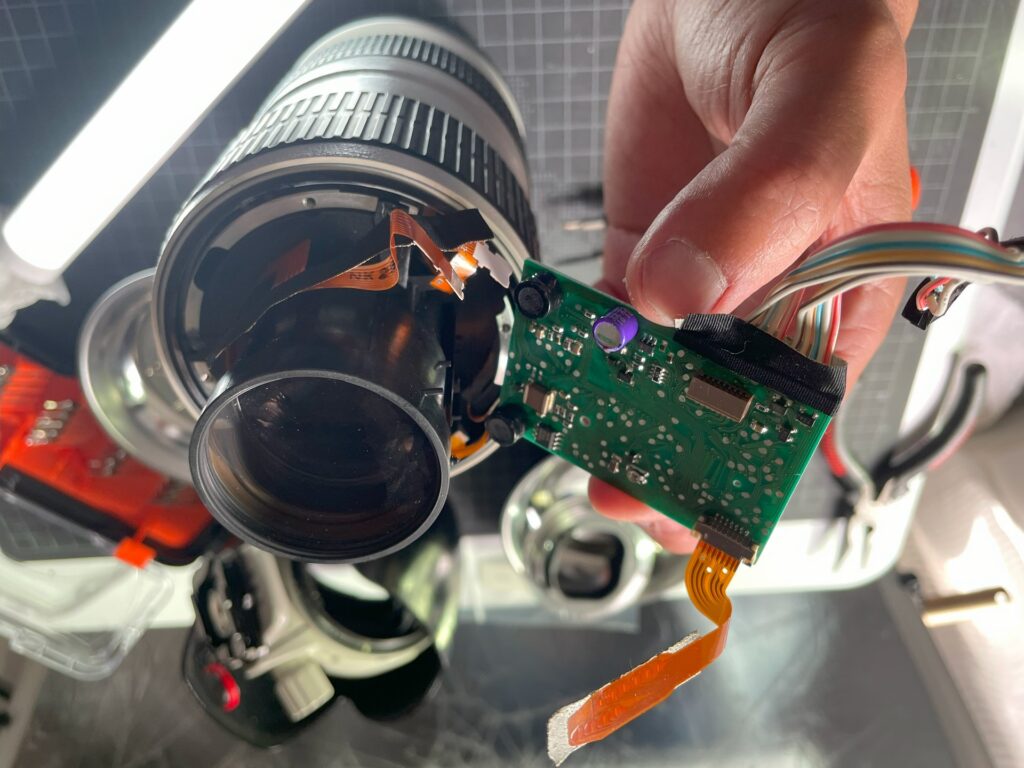
喜び勇んでマウント部の金属をレンズ本体から外したところ、写真のように複数のコードと繋がったままだった。
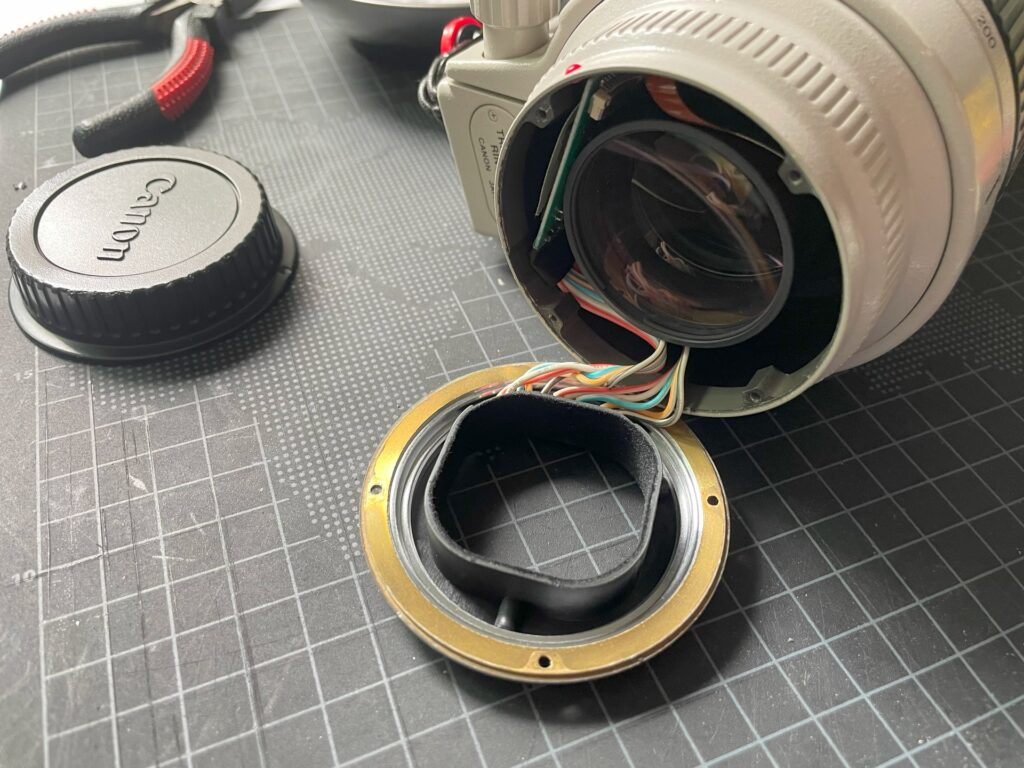
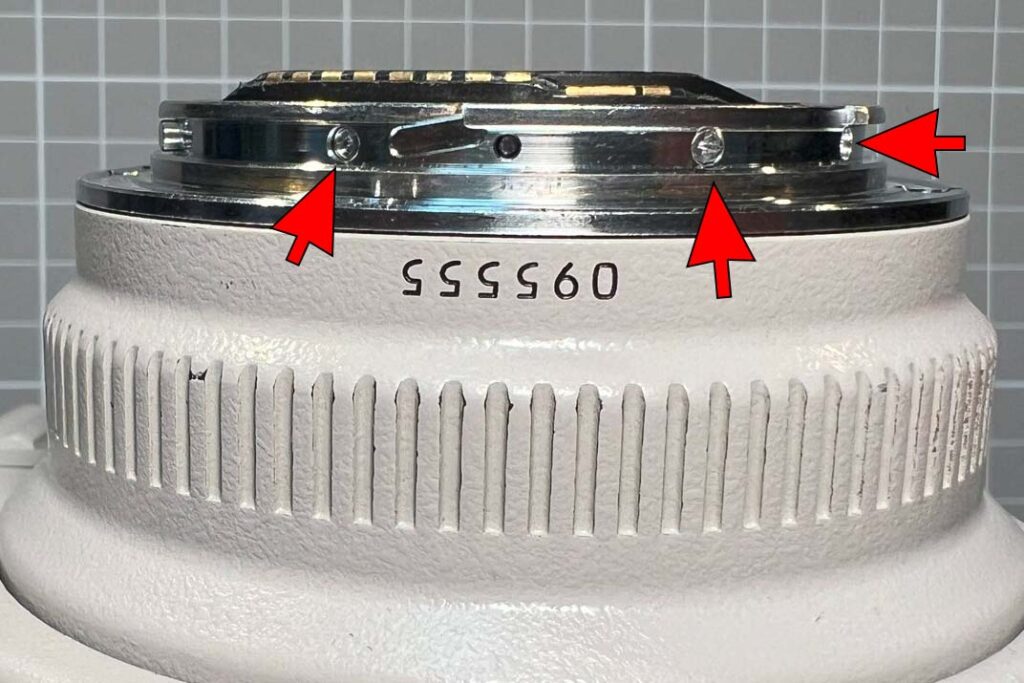
このコード群は金属マウント部の内側の黒いパーツにつながっているので、金属マウント部の側面にある赤矢印が示す小さいネジを外さないといけない。
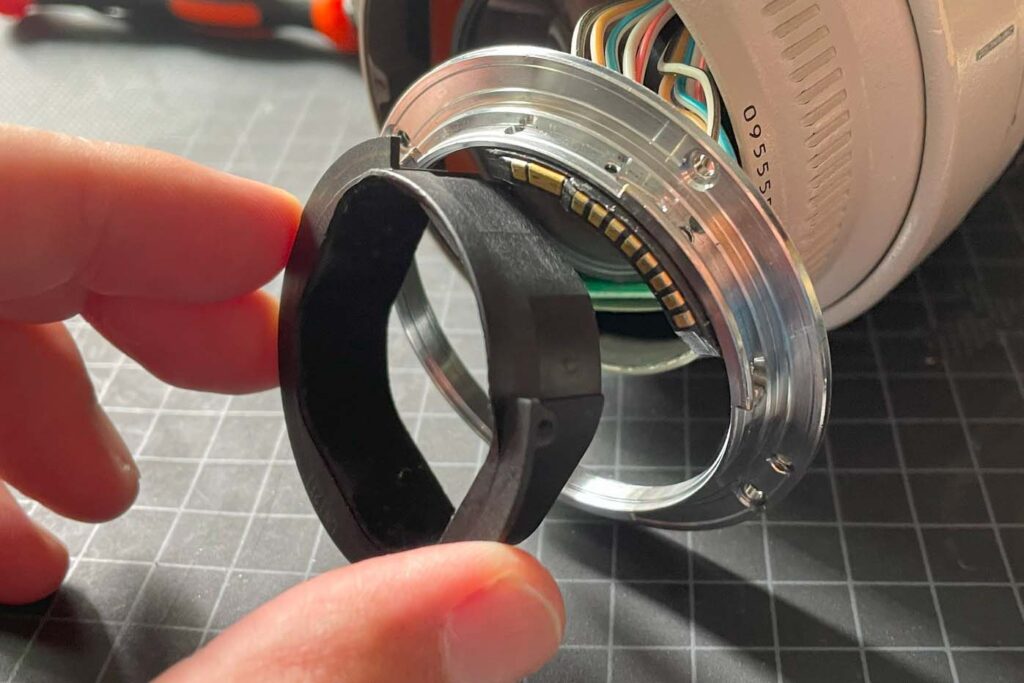
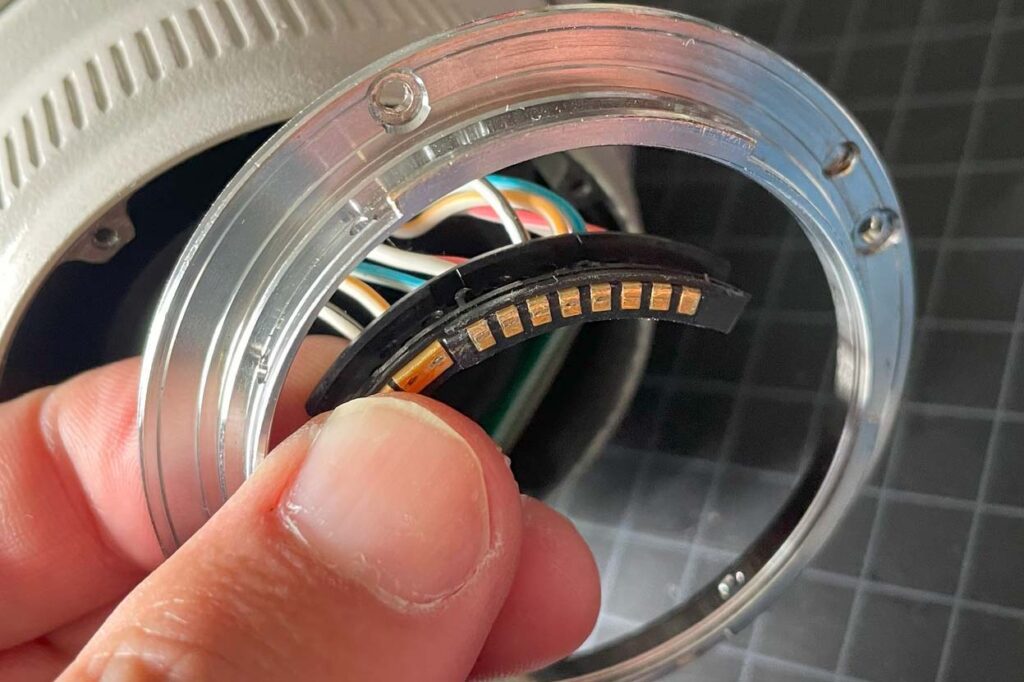
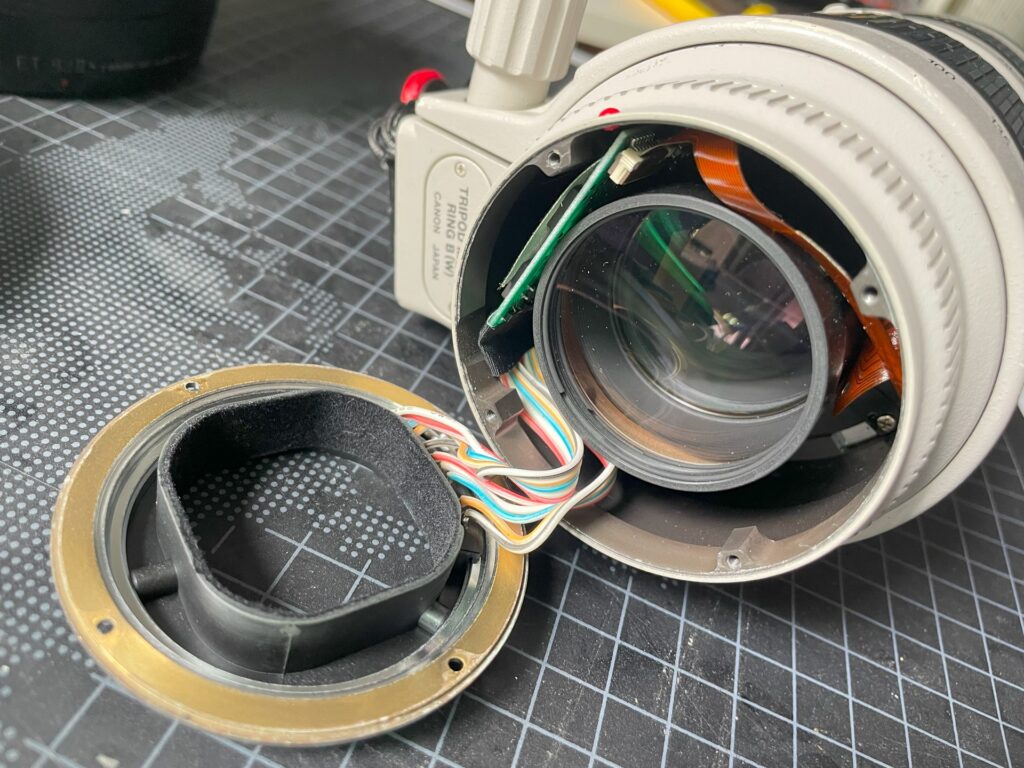
ネジを外すことで、このように金属と黒いパーツが分離する。この黒いパーツはさらに二つに分かれており、より小さいパーツが、レンズとカメラ本体の電気信号をやり取りする重要なパーツだ。これには側面に凸部がついており、金属パーツの側面の穴に入れることで位置を間違えずに戻せる仕組みだ。戻す時のとめに覚えておく。マウント部を外してレンズ本体の中を見ると、手前側のレンズ部とそれに付随したボードなどが入っている。これ以上分解して大丈夫かと、やや不安になるが前進あるのみ。
鏡筒部
第一鏡筒部(三脚座部)を外す
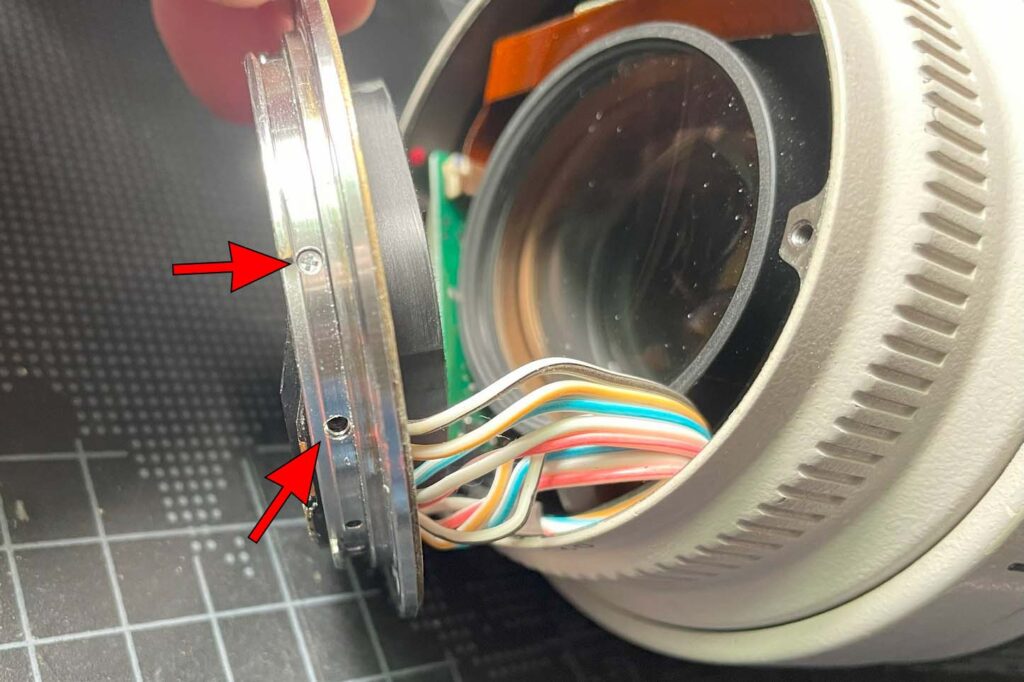
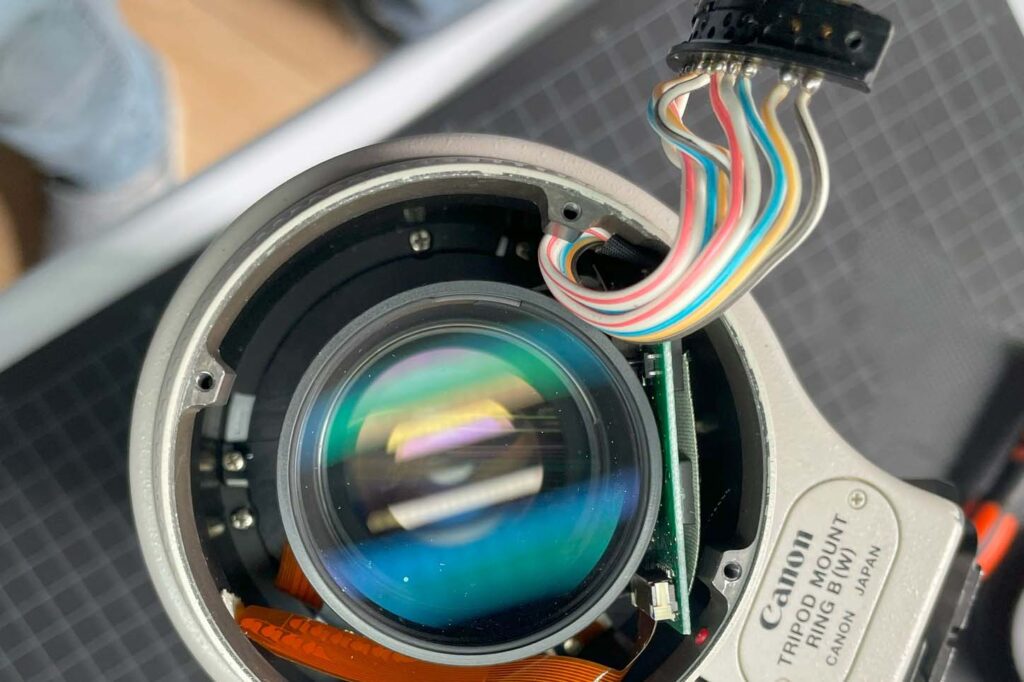
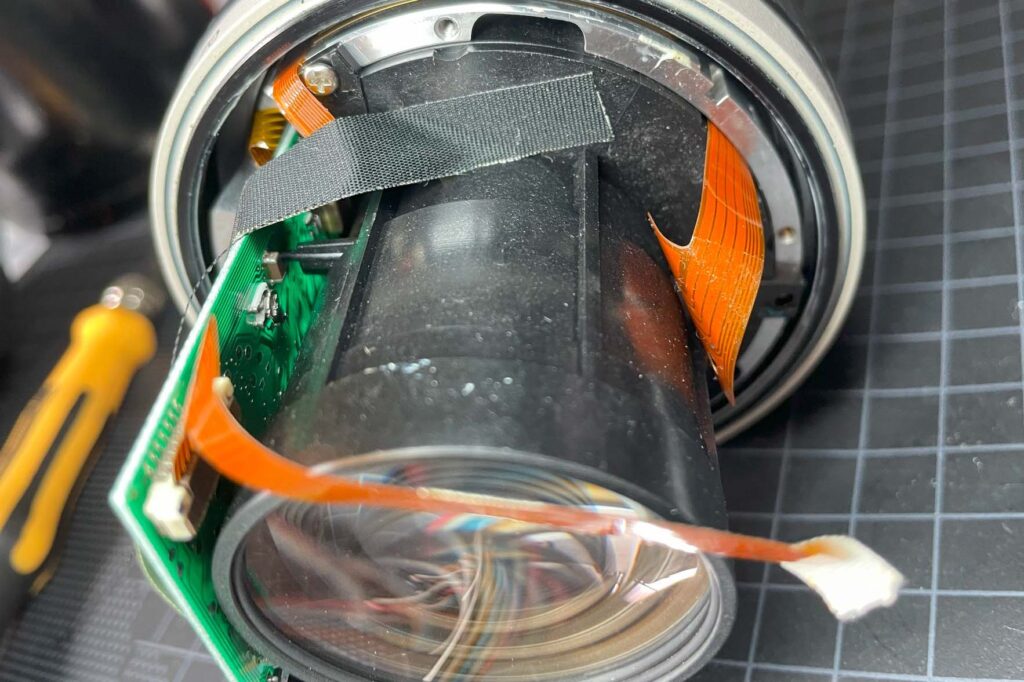
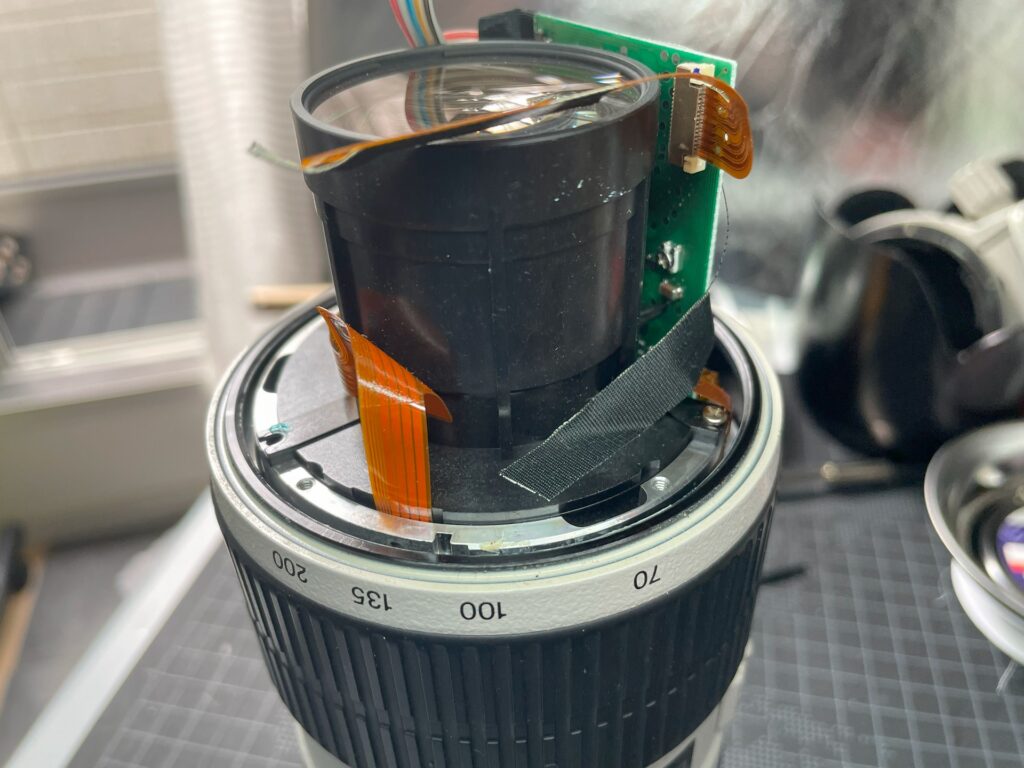
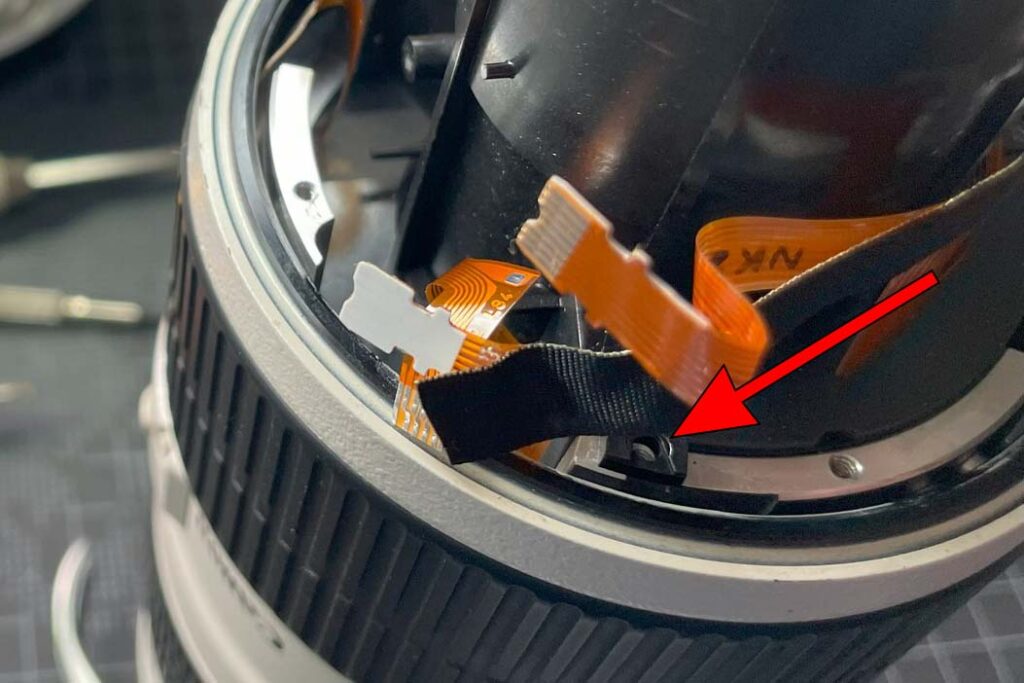
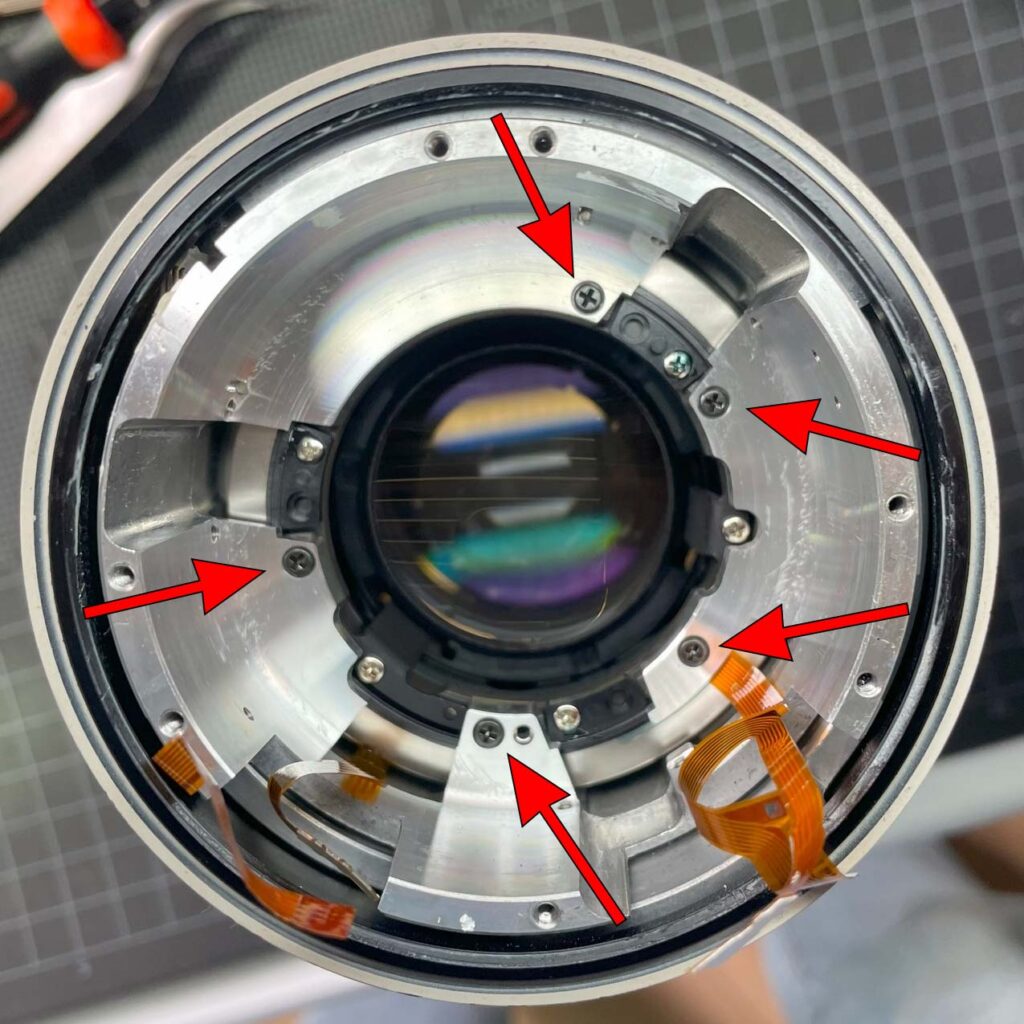
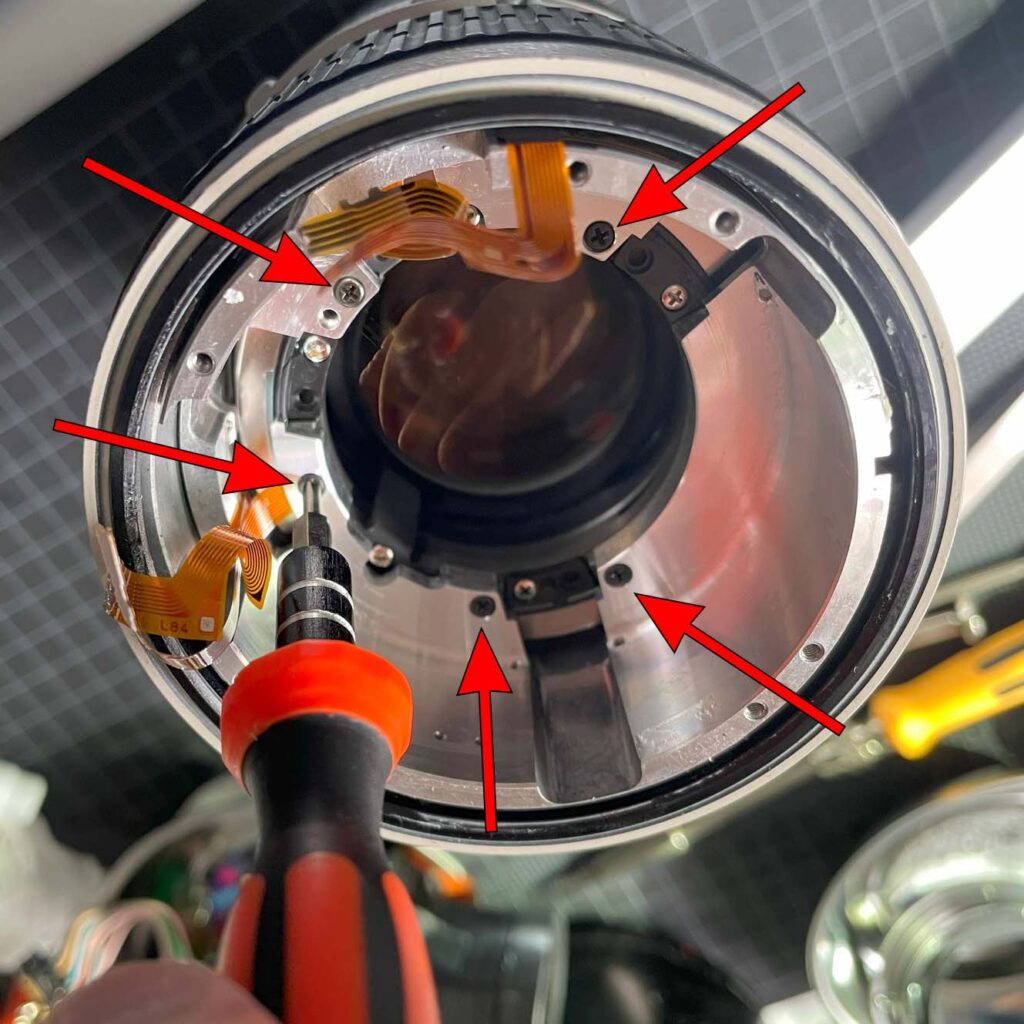
ここから先は、さらに元に戻す際に重要なので、付属パーツがどのように収まっているかよく確認するために写真が重要だ。
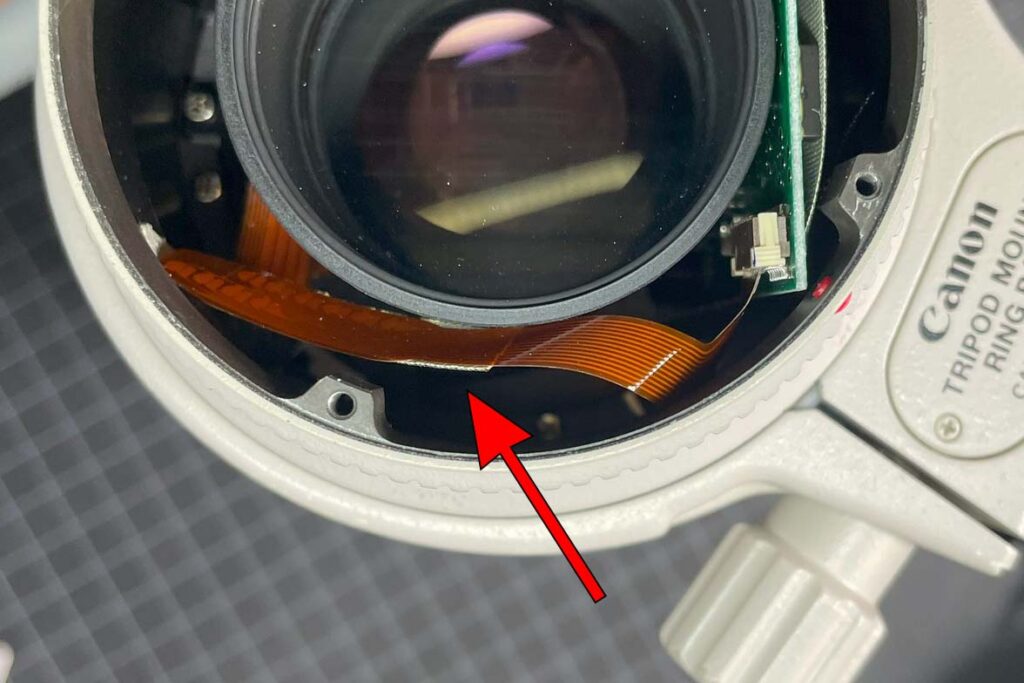

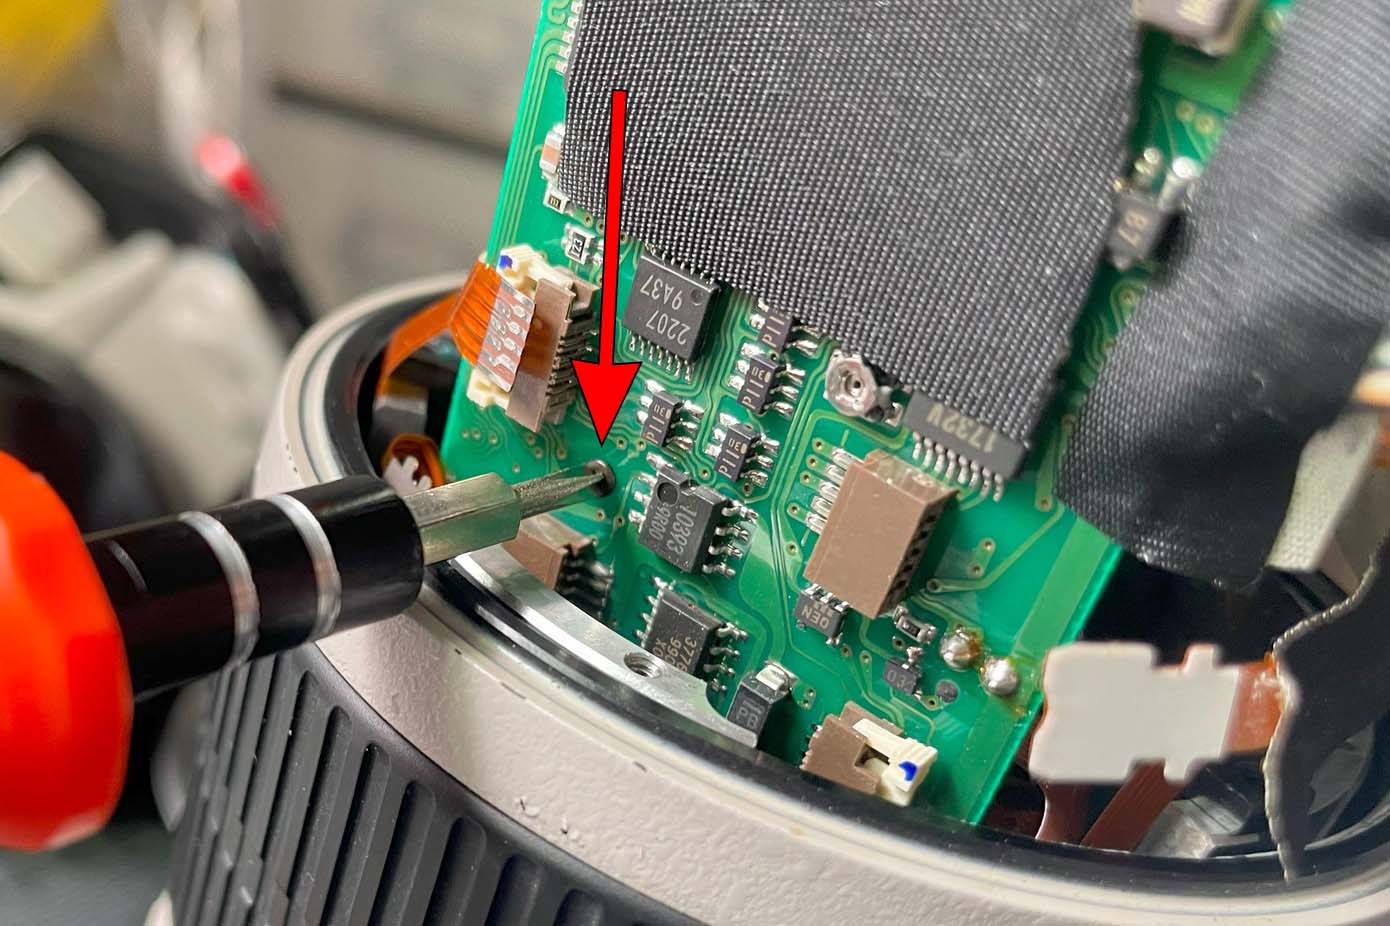
この上画像の矢印で示したオレンジパーツは浮いた状態で空間に収まっている。これをさらに中から引き出して奥を見ると、下画像の赤矢印のところに+ネジが見える。場所が狭くて奥なので、細長い精密ドライバーが必要なのと、力が入れずらいのでネジをナメないよう気を付ける必要がある。力をしっかりと押さえつけてドライバーを慎重に回すことが大事だ。
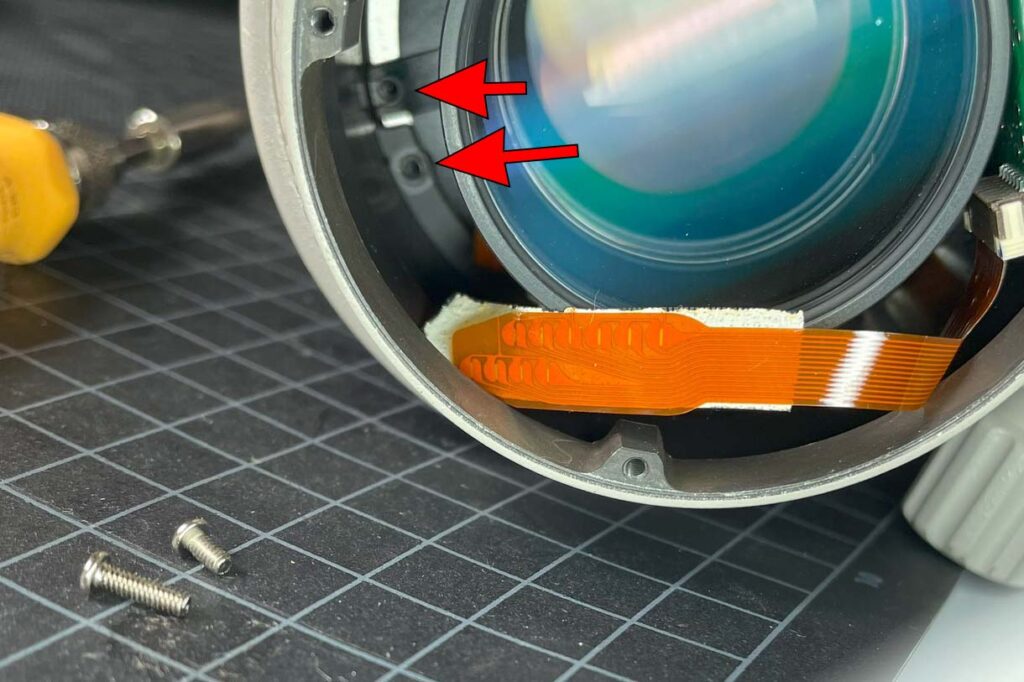
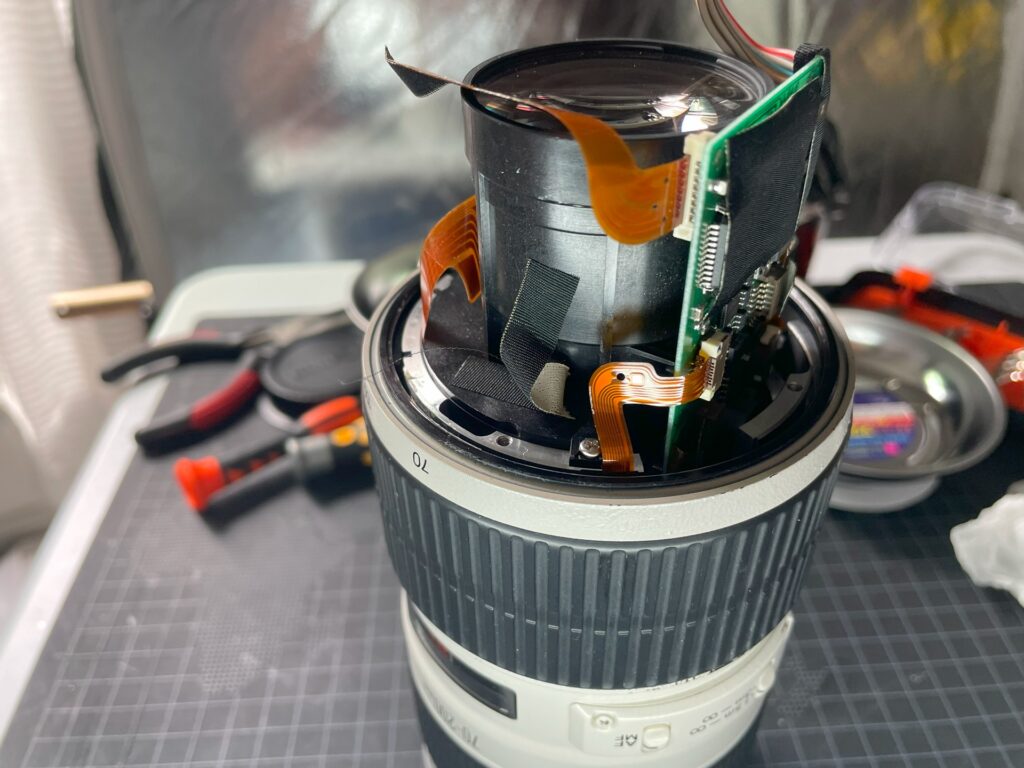
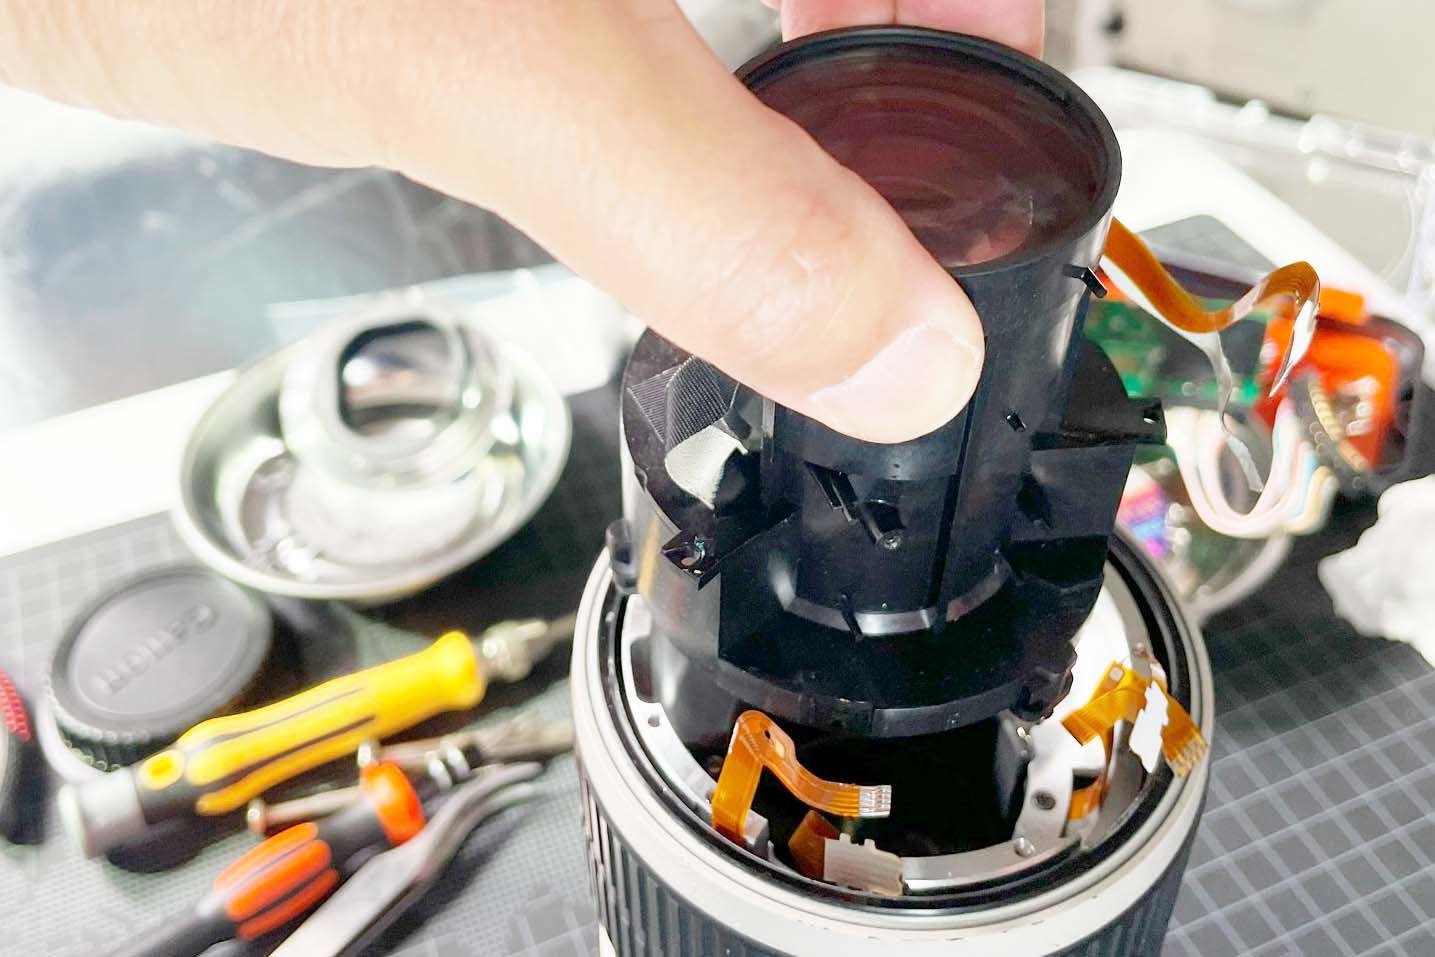
ネジを外すとマウント側の第一鏡筒部(三脚座部)が外れ、電子パーツが沢山付属している手前レンズ部がむき出しになった。


電子配線の配置確認
ここから先は、電子制御用の基板やその配線等の電子パーツに触れるので、切れたり壊れたりしないようさらなる細心の注意が必要だ。また、パーツを外すだけでなく、後に基に戻す必要があるので、何がどこに接続され、どのように収納されているか認識しなくてはならない。そのため、多めの画像を掲載しておく。パーツを戻す際に、これらの画像を見れば、特に接続内容を覚えておかなくても十分確認できるであろう。まさに自分がそうしたからだ。画像をクリックすれば全て拡大出来るので、利用して頂きたい。
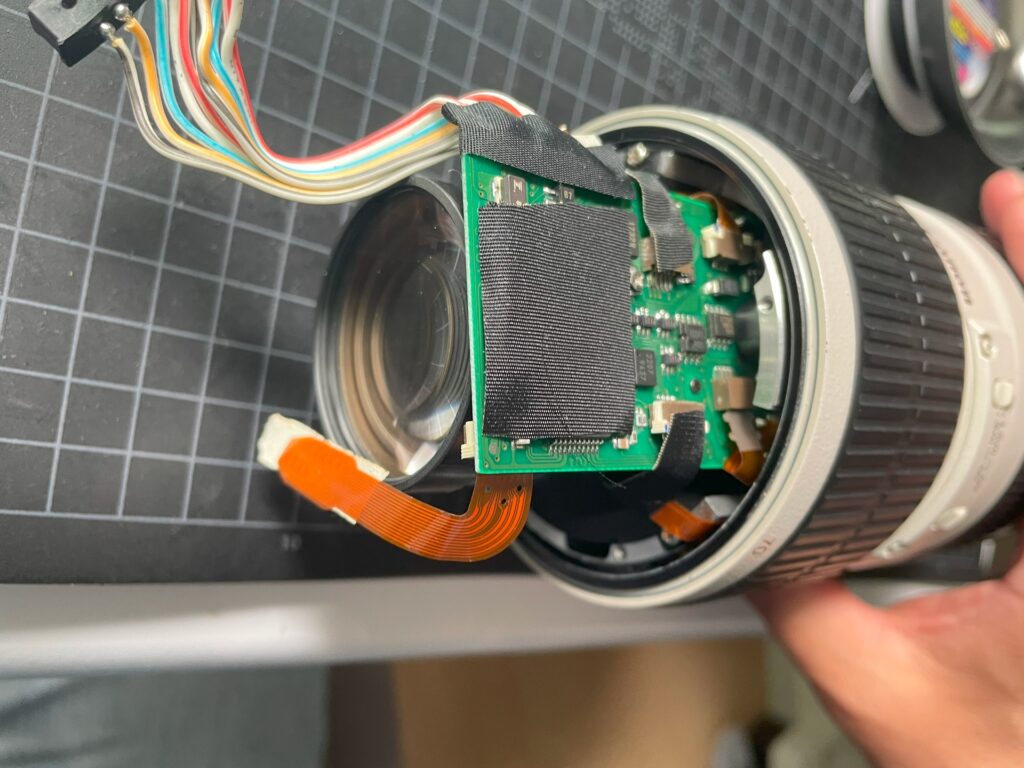
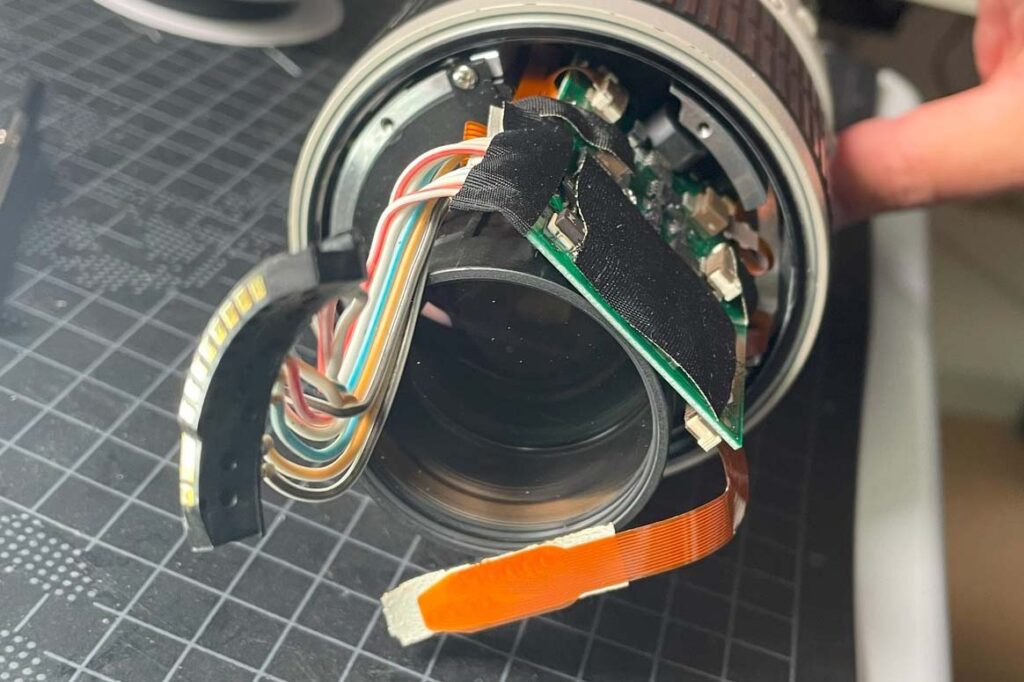
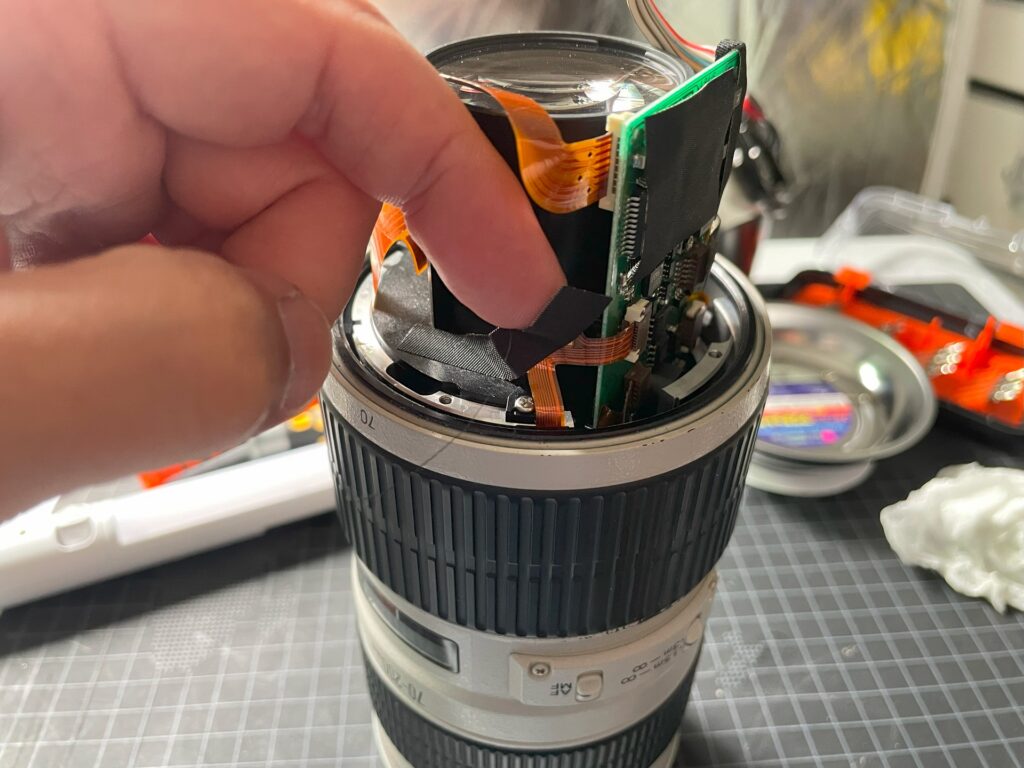
黒い布のようなものは、テープであり、レンズ部に貼り付けて電子パーツの抑えにしているものだ。
基盤に接続している配線は、2本がロック機構付き。他は形状違いの差し込みタイプだ。
電子パーツ分解
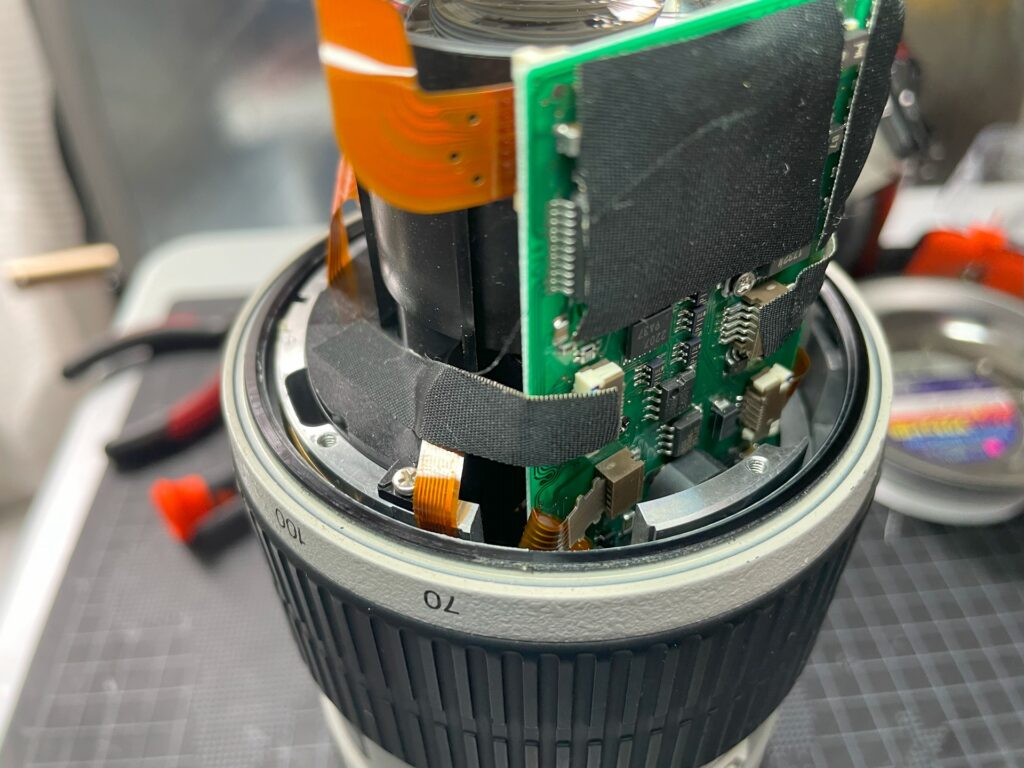
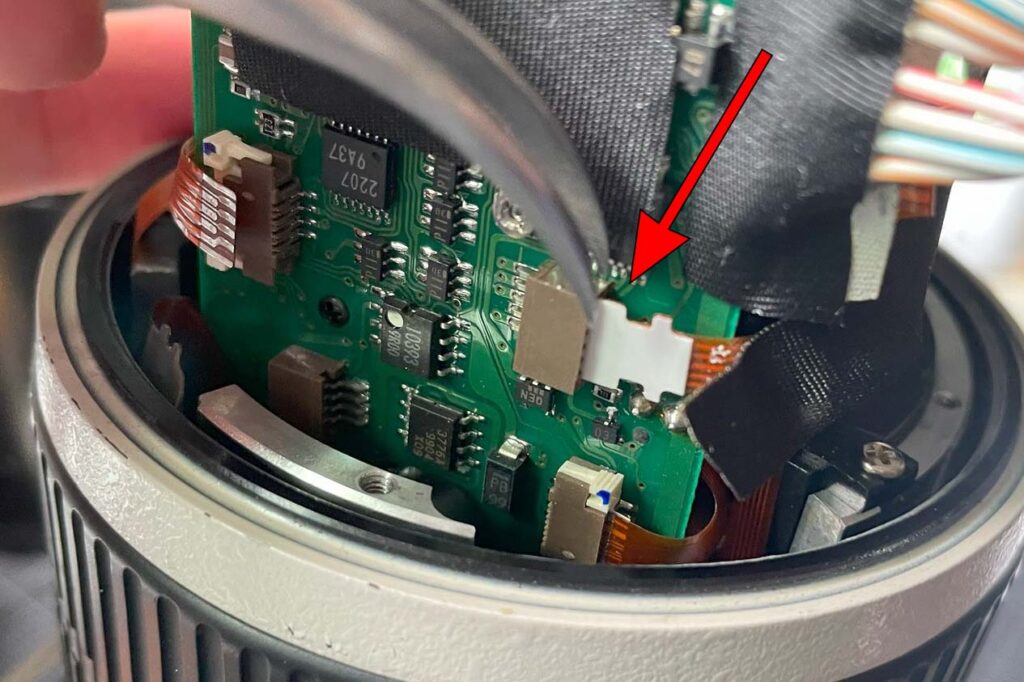
ピンセットを使って電子配線を基盤の接続部から外す。
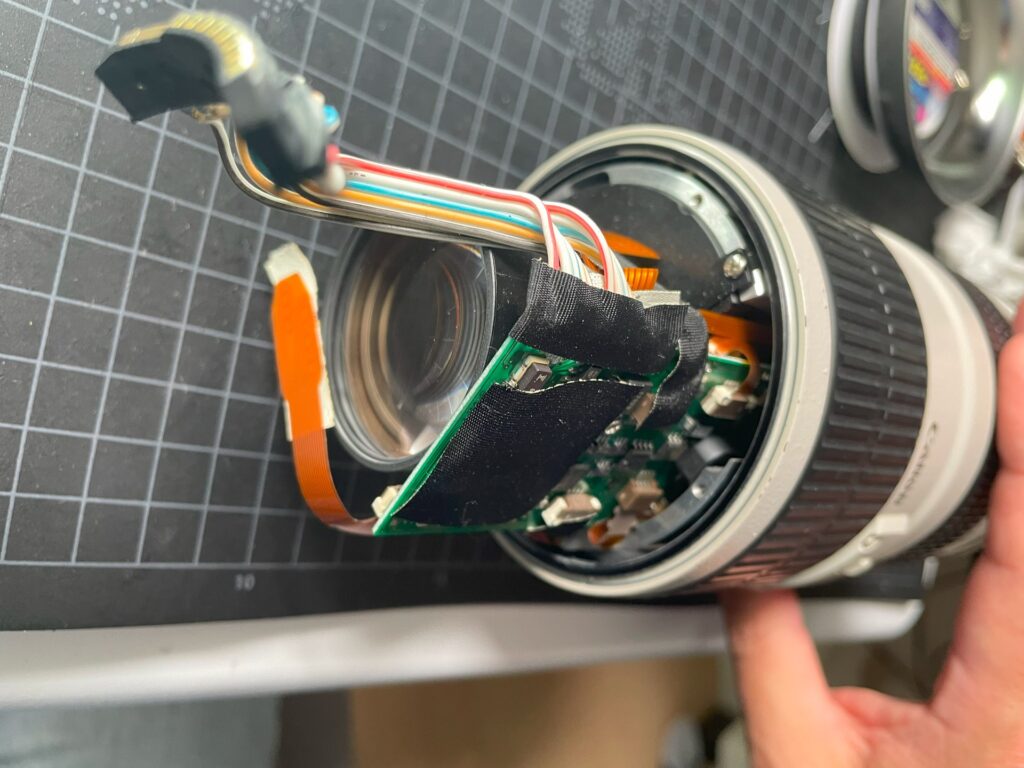
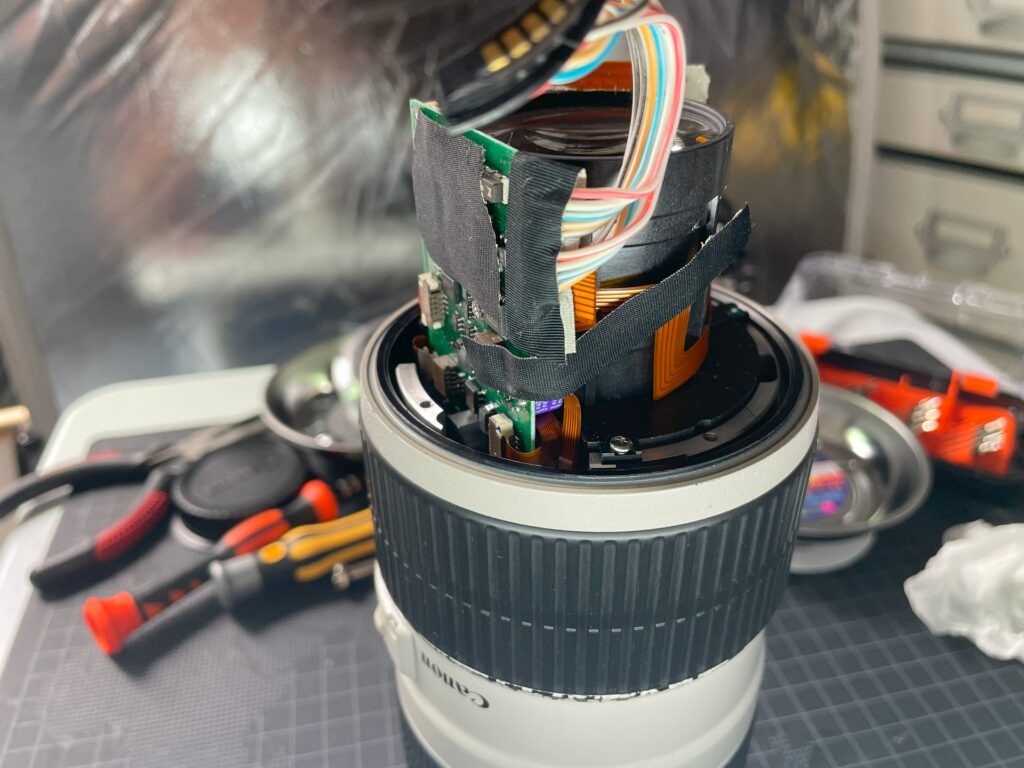
まずは基盤左側の2つの配線をピンセットで行う。上部はロック機構タイプだ。
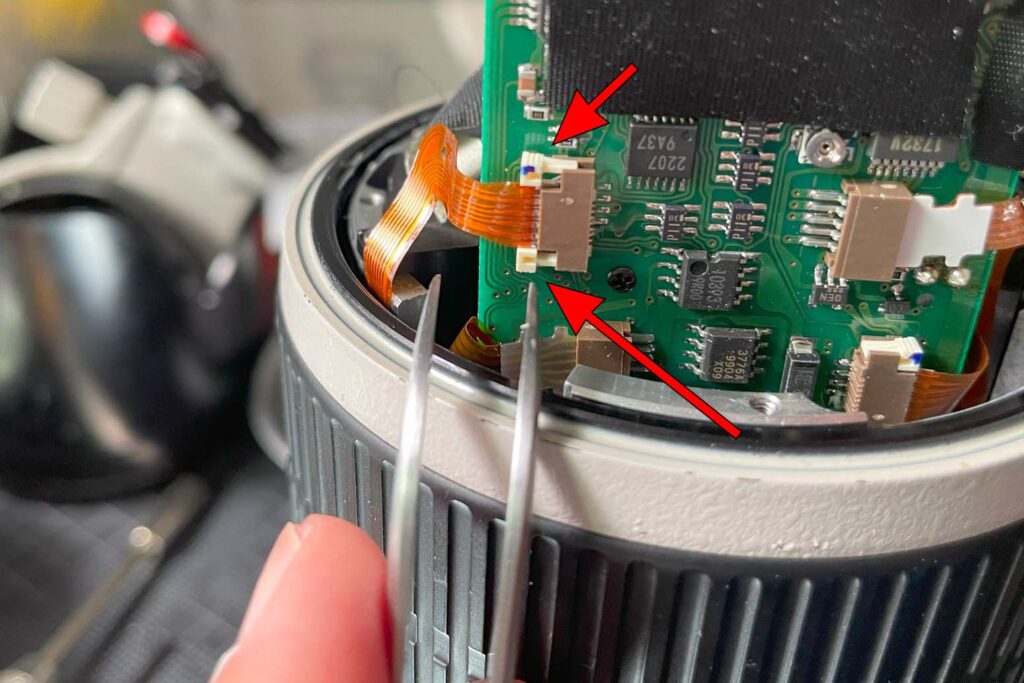
下部は差し込みタイプなので、配線をピンセットでしっかり挟み込んで左右に揺らしながら慎重に引き抜く。
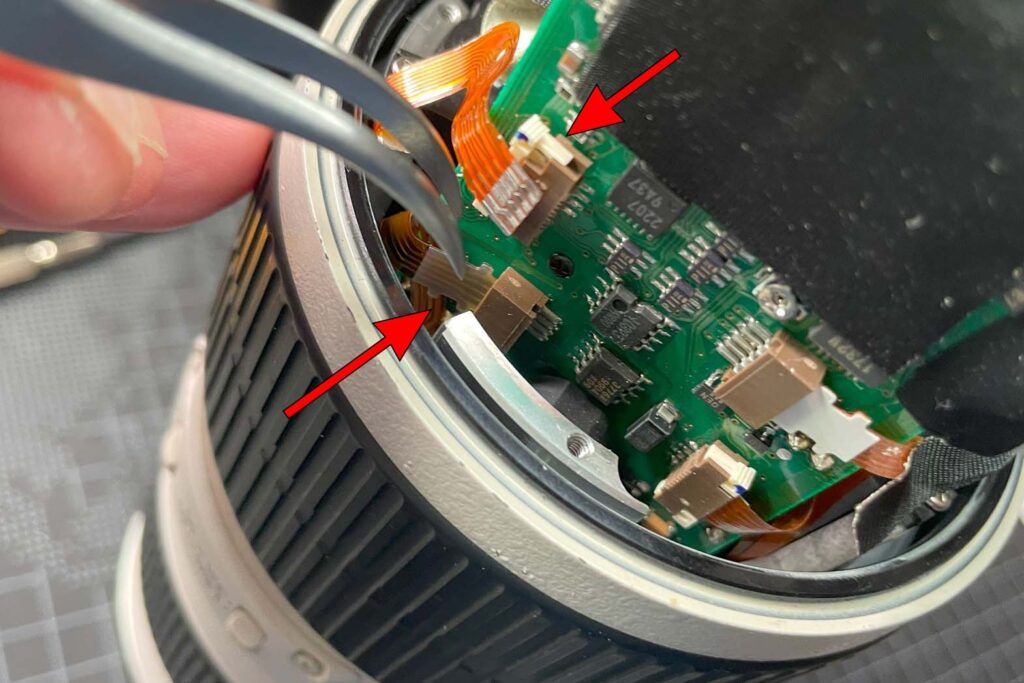
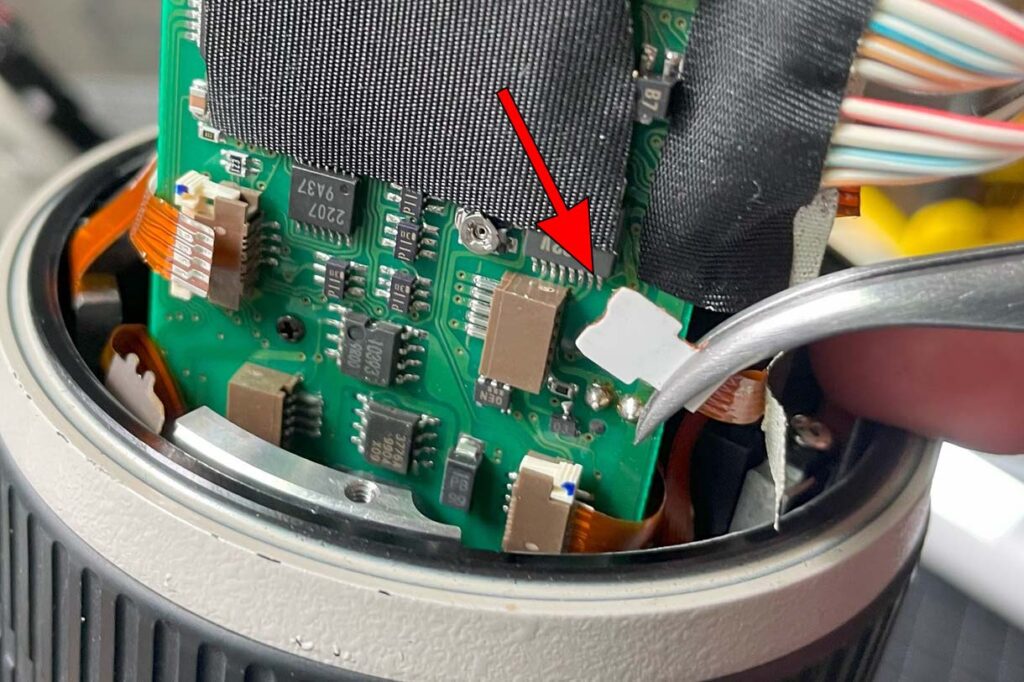
次に基盤右側の2つの配線を外す。
上部は差し込みタイプだ。差し込みタイプはどのくらい差し込まれているか画像で確認出来れば、戻す際の参考になる。
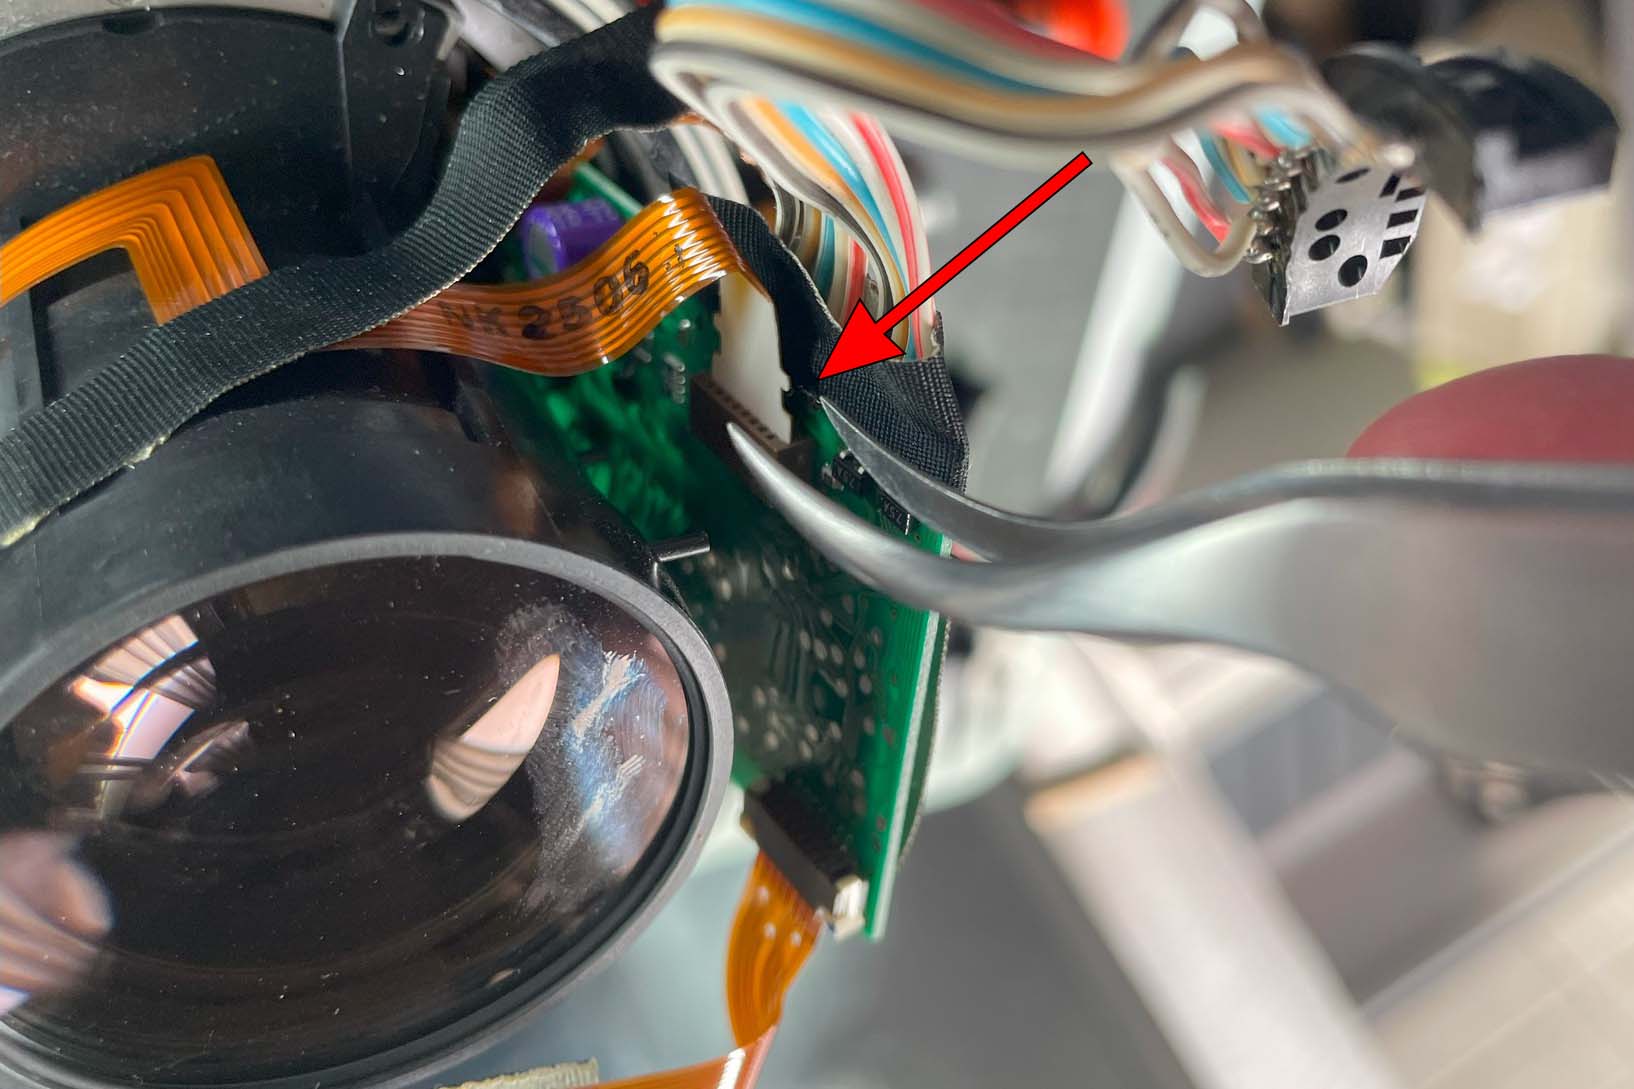
右側下部は、ロック機構付きだ。奥にあるので少しやり難いが、ロックさえ外れれば比較的簡単に抜き差しできる。
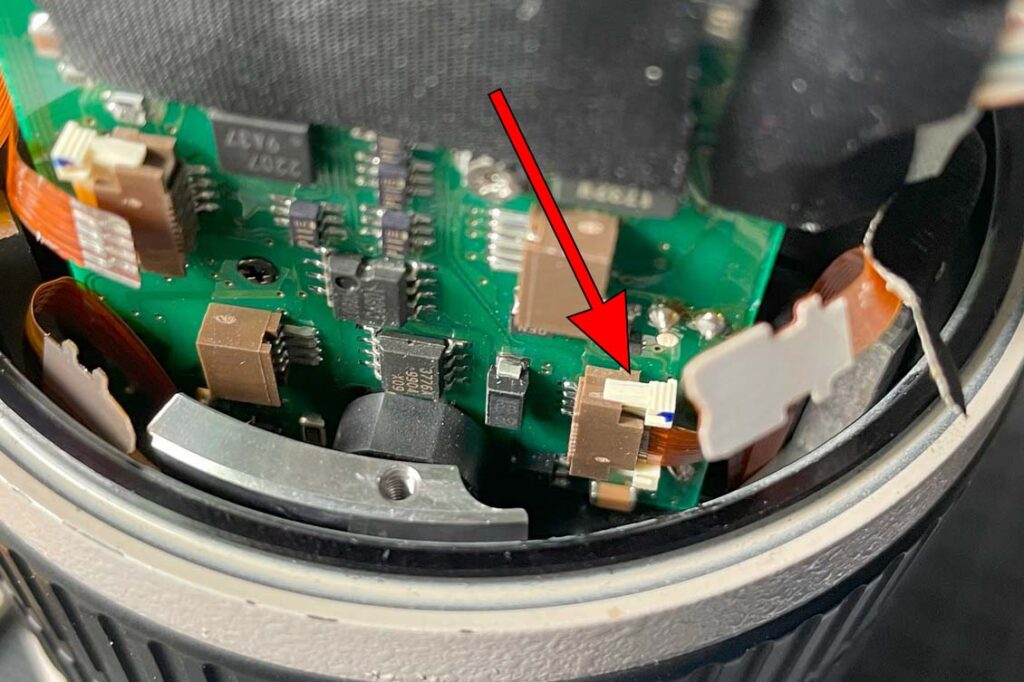
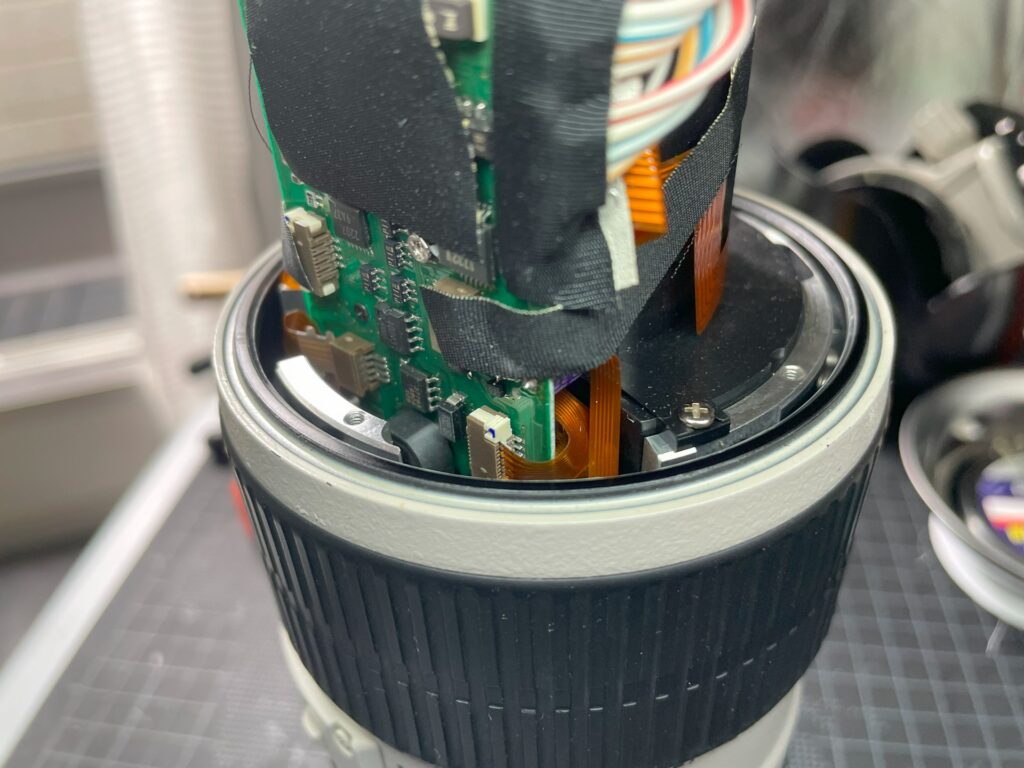
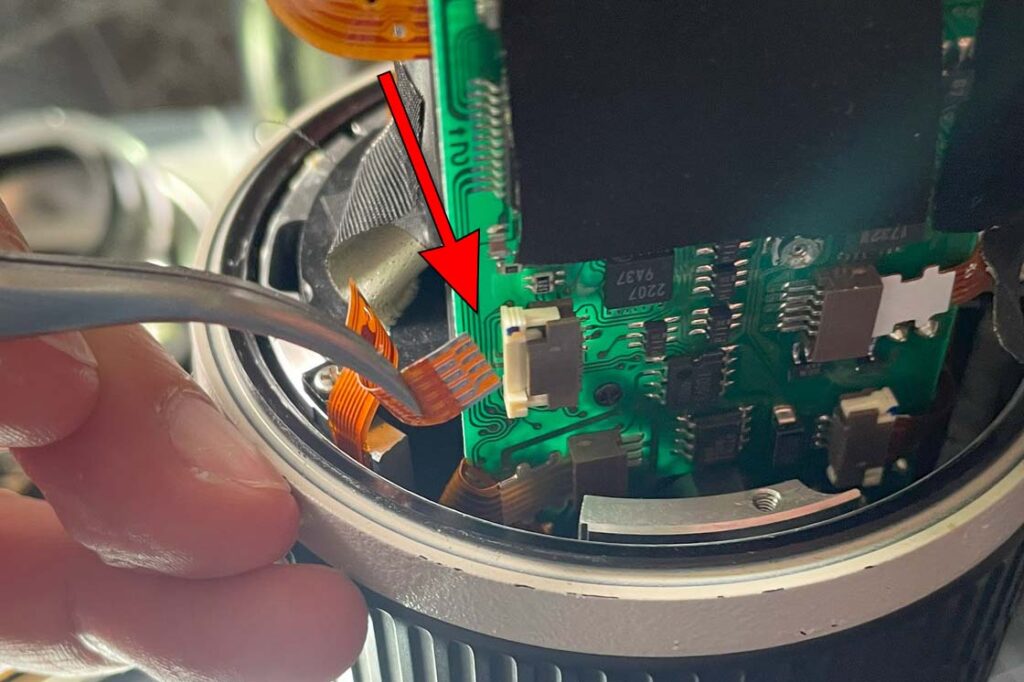
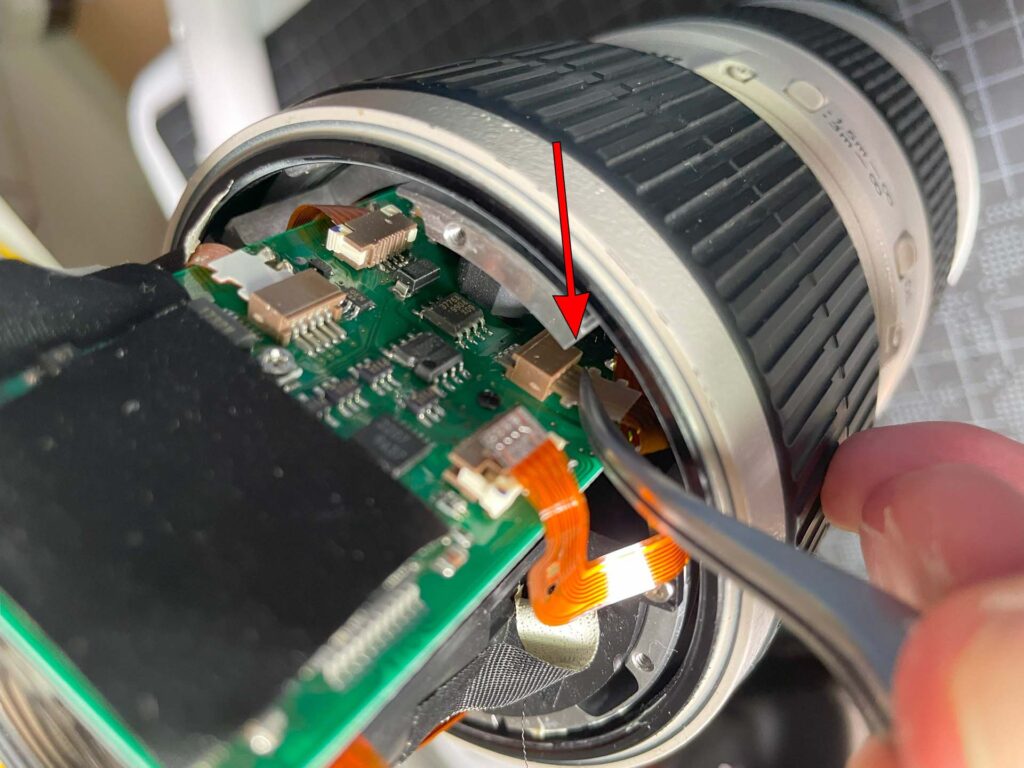
配線がどの程度まで差し込まれているか戻す際に画像でしっかりと確認していれば接続エラーを防げる。この基盤の裏にも配線が接続されており、抜きやすくするために、基盤を固定している+ネジを外す。
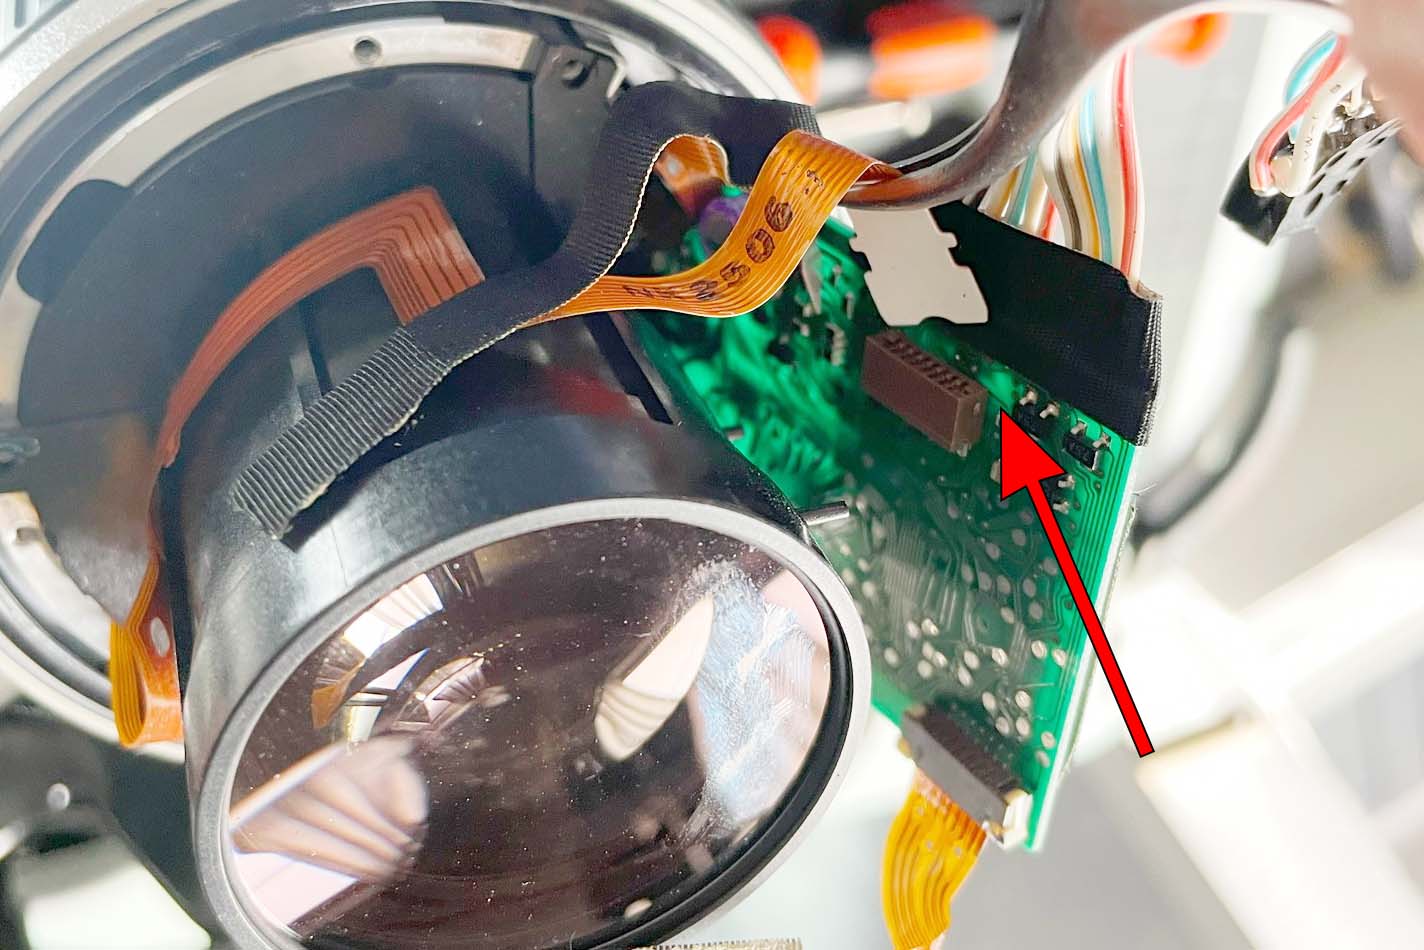
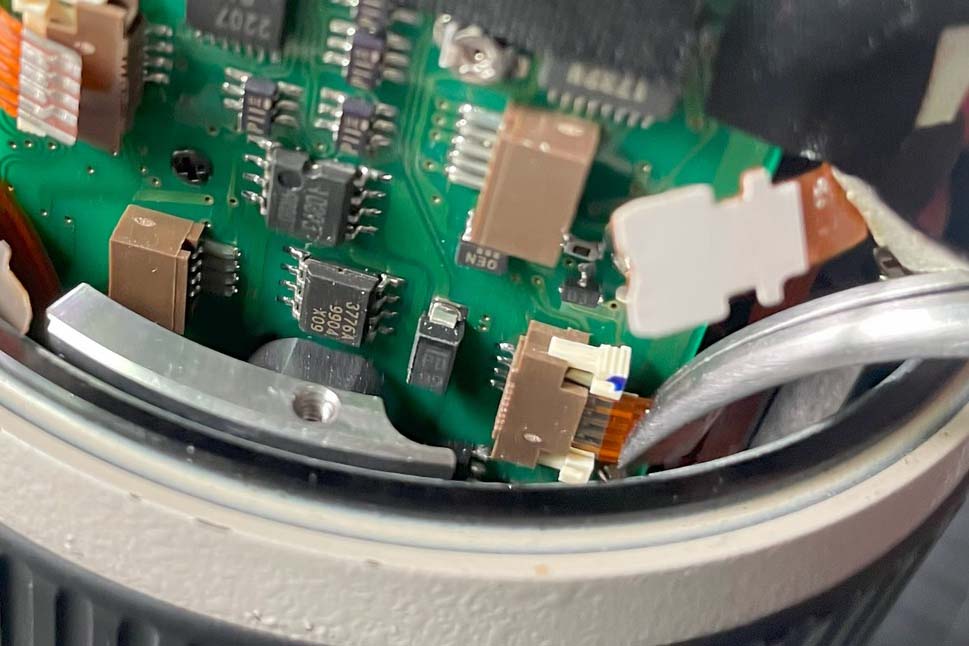
基盤の裏、左上部に差し込み式の接続部がある。右側上部にも接続部が見えるが、この配線は浮いたままの状態のものなので、特に触れない。
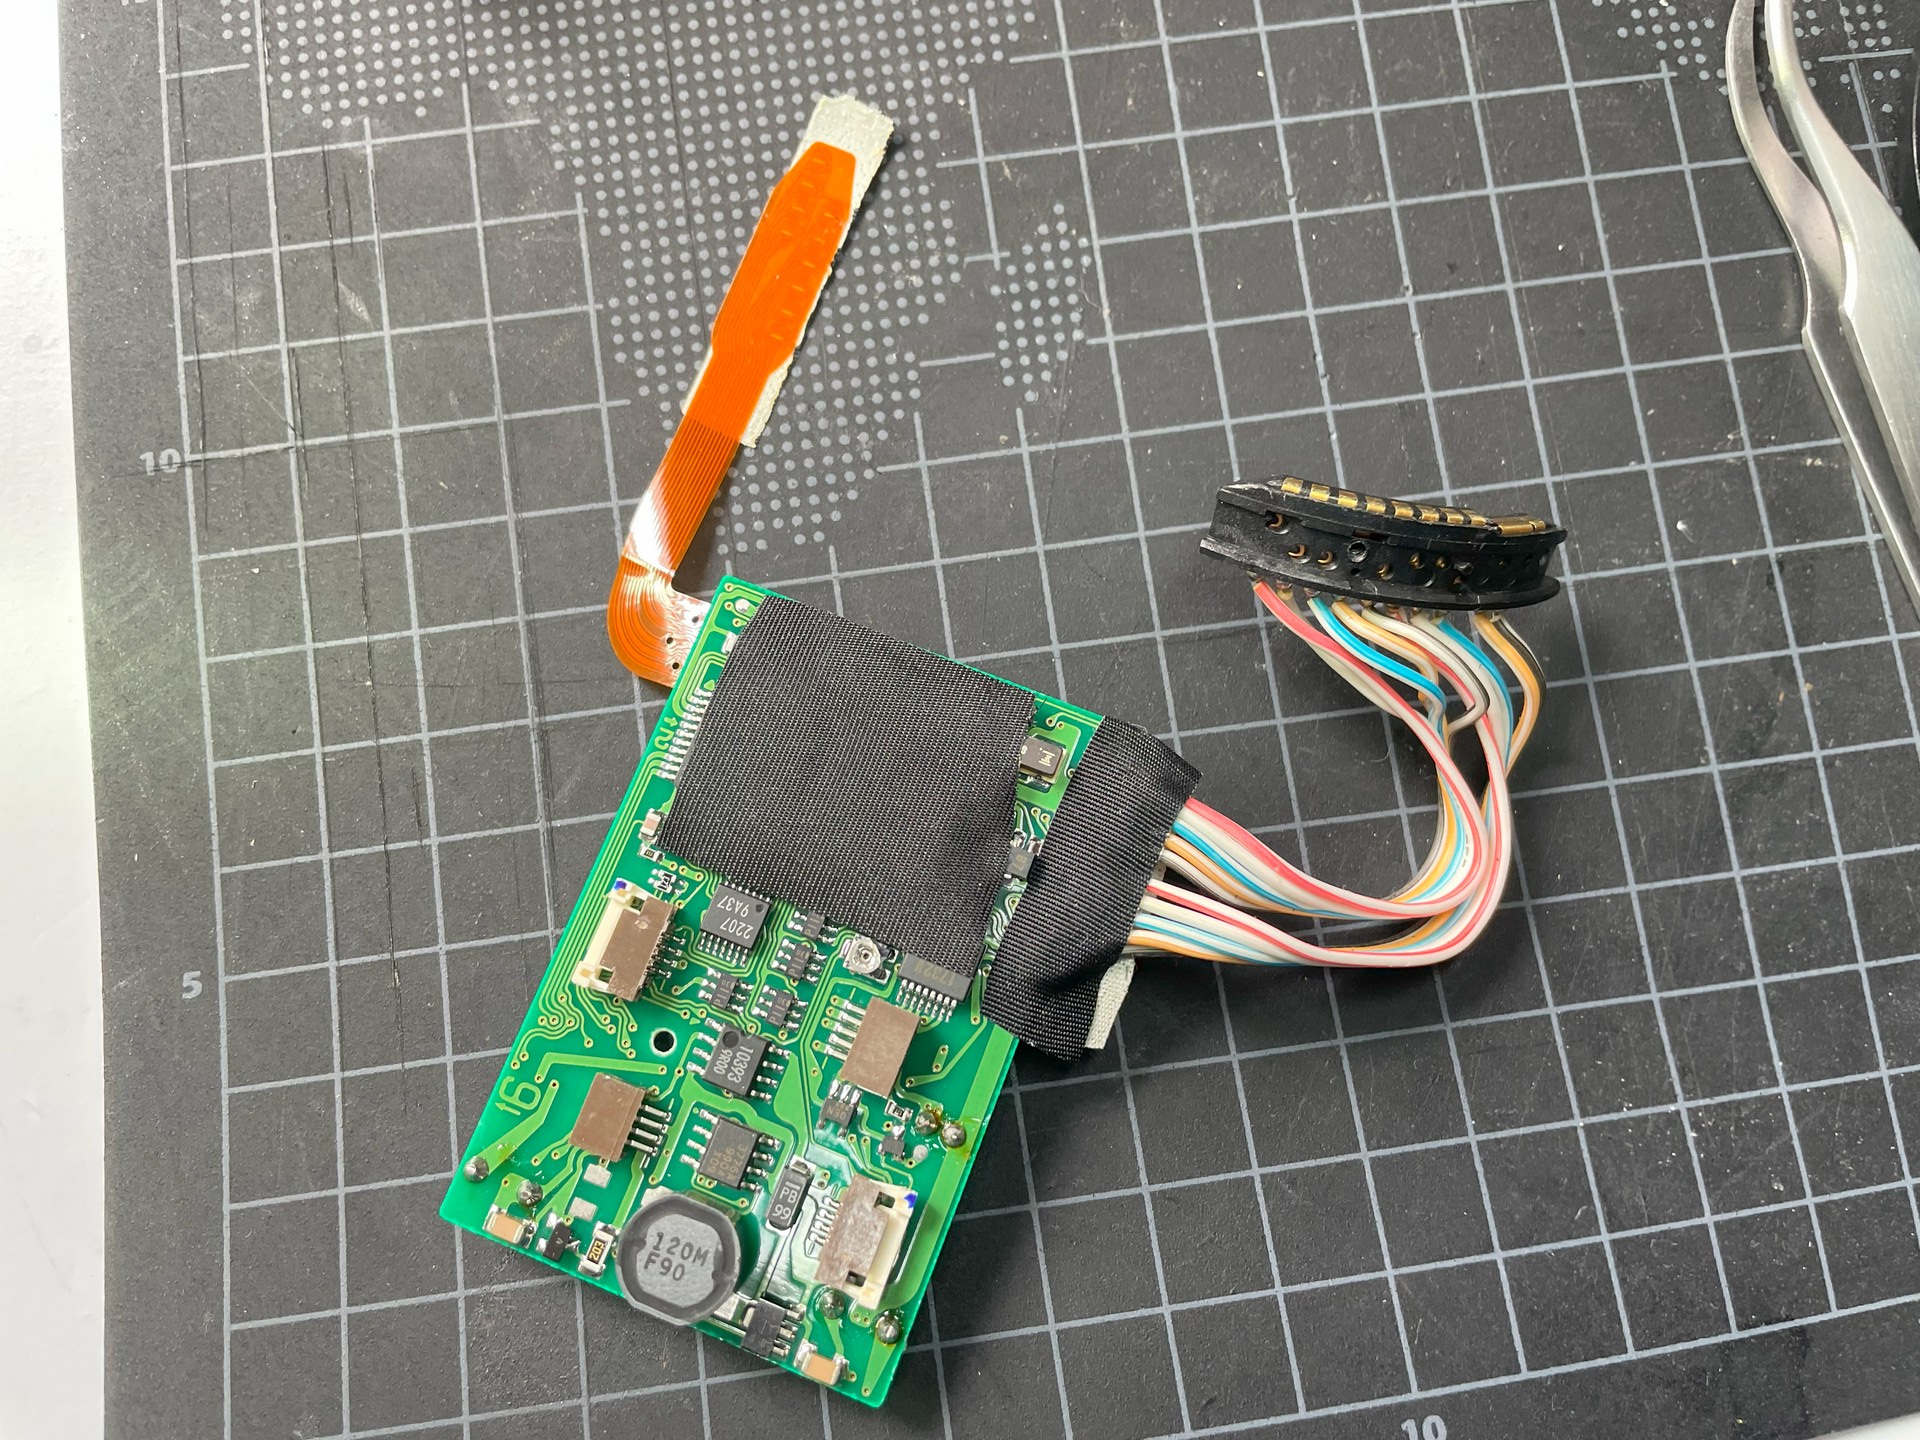
これで基盤を本体から取り外すことが出来た。
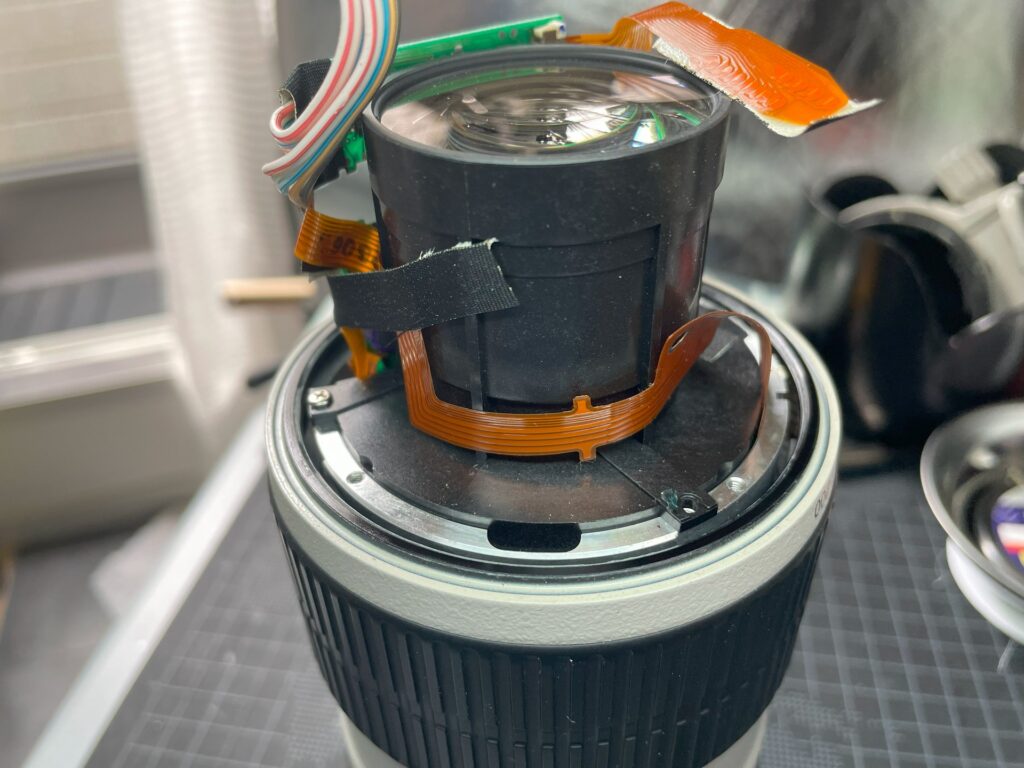
レンズ部取り外し
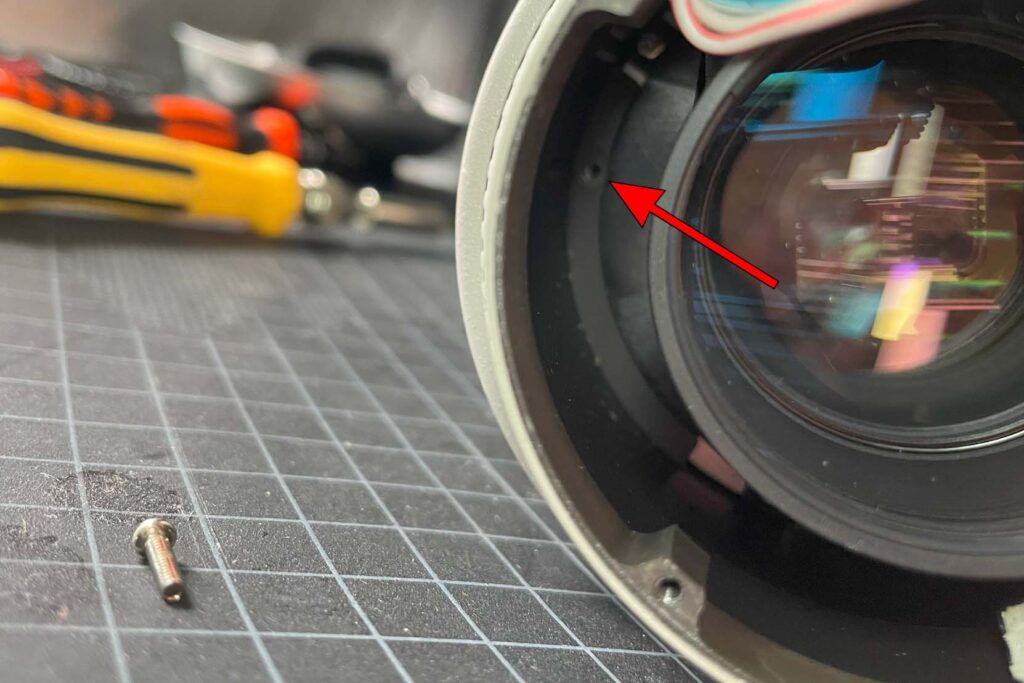
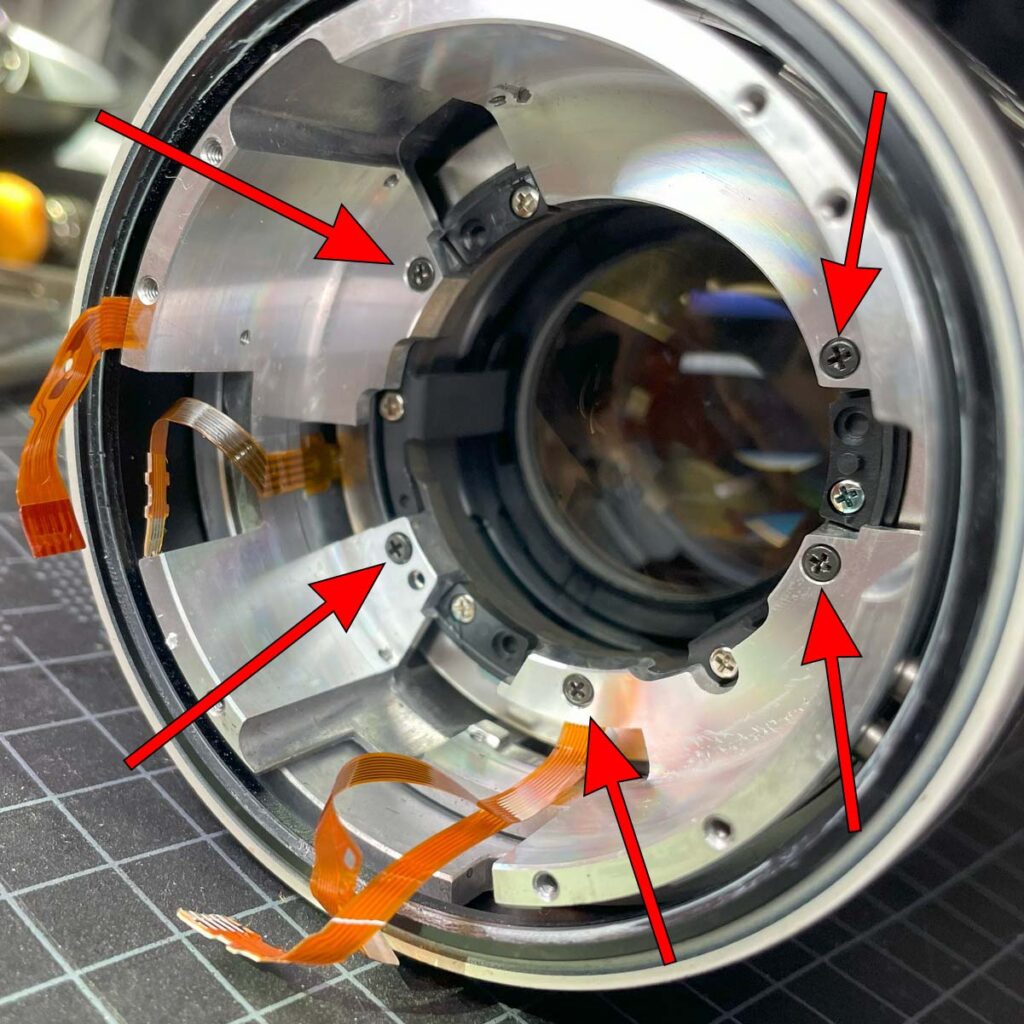
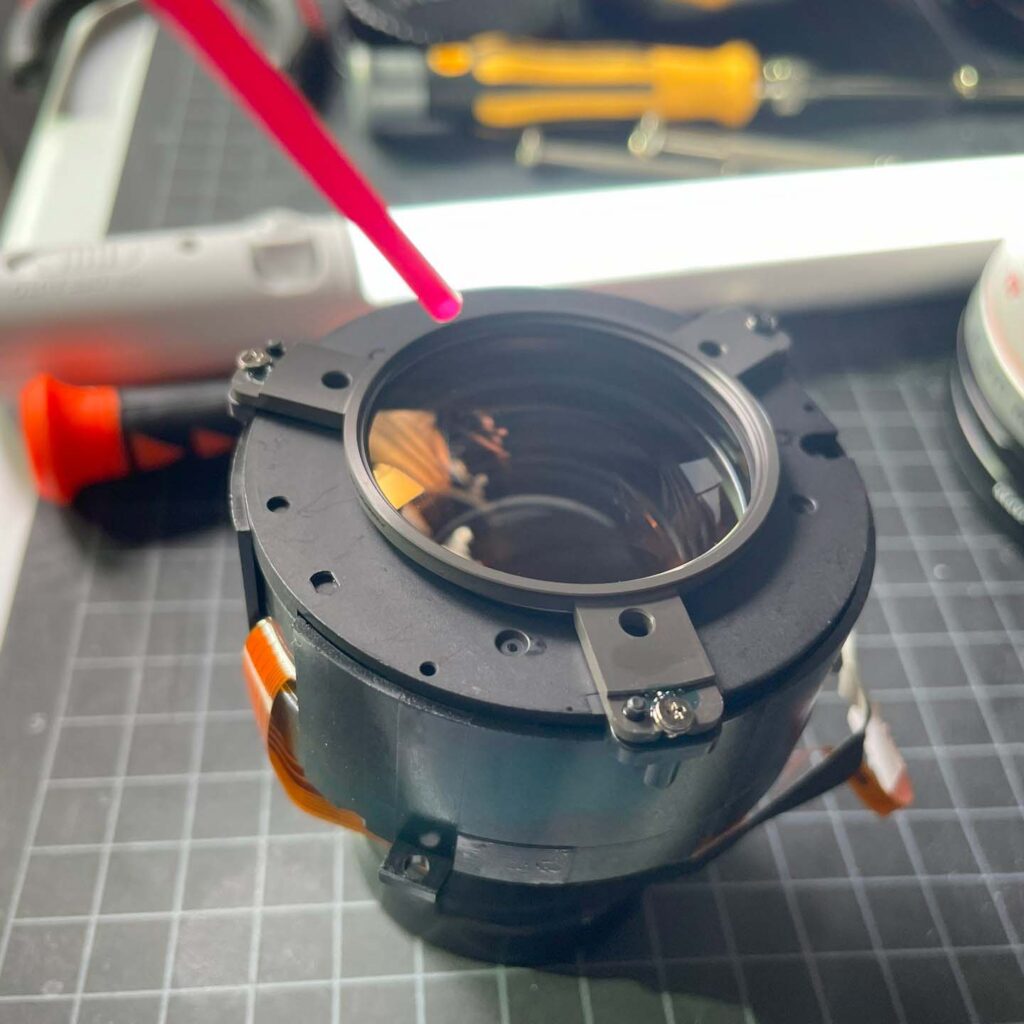
さらに、むき出しになった黒いレンズ部と本体を結びつけている赤矢印部分にある+ネジを外してレンズ部を本体から外す。

このように電子配線は本体に残り、黒いレンズ部がスッポリ外れる。
緩みネジの修復
問題の元凶に到達!
これでついに本体の鏡筒をグラつかせている元凶である緩んだ+ネジが現れた。
赤矢印の先にある黒い+ネジがそれだ。
ネジ緩みの締め直し完了
いかにも見た目も緩んでいそうな黒ネジは、グラグラであった。
さすがに長年の使用で緩んでしまったのであろう。
心して締め直したので、気分も引き締まった思いだった。
これでガタつきの原因の特定と、ネジ締め直しのメンテナンスの片道は完了!
これからの戻り道は、決して簡単ではないが、辿ってきた道を画像で振り返りながら慎重に作業すれば問題なく終えられるであろう。
パーツ戻し
なお、パーツを戻す際には、可能な限り指紋をふき取り、ブロアーで細かなゴミを吹き飛ばすなどすることが大事だ。
出来れば二度と分解しなくても良いように、電子パーツの配線にも気を付けてトラブルの基を絶つようにしたい。
電子パーツの接続が甘いとオートフォーカスが出来なかったりするので、どの程度まで当初から配線が差し込まれていたかなどを画像で確認するようにしたい。
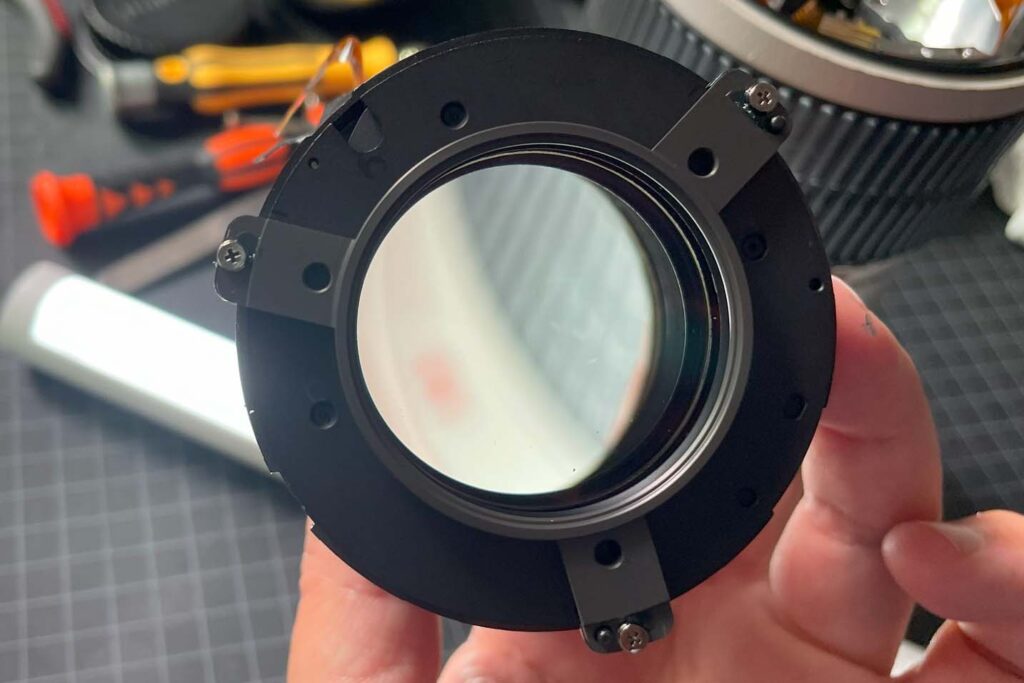
高性能レンズ復活
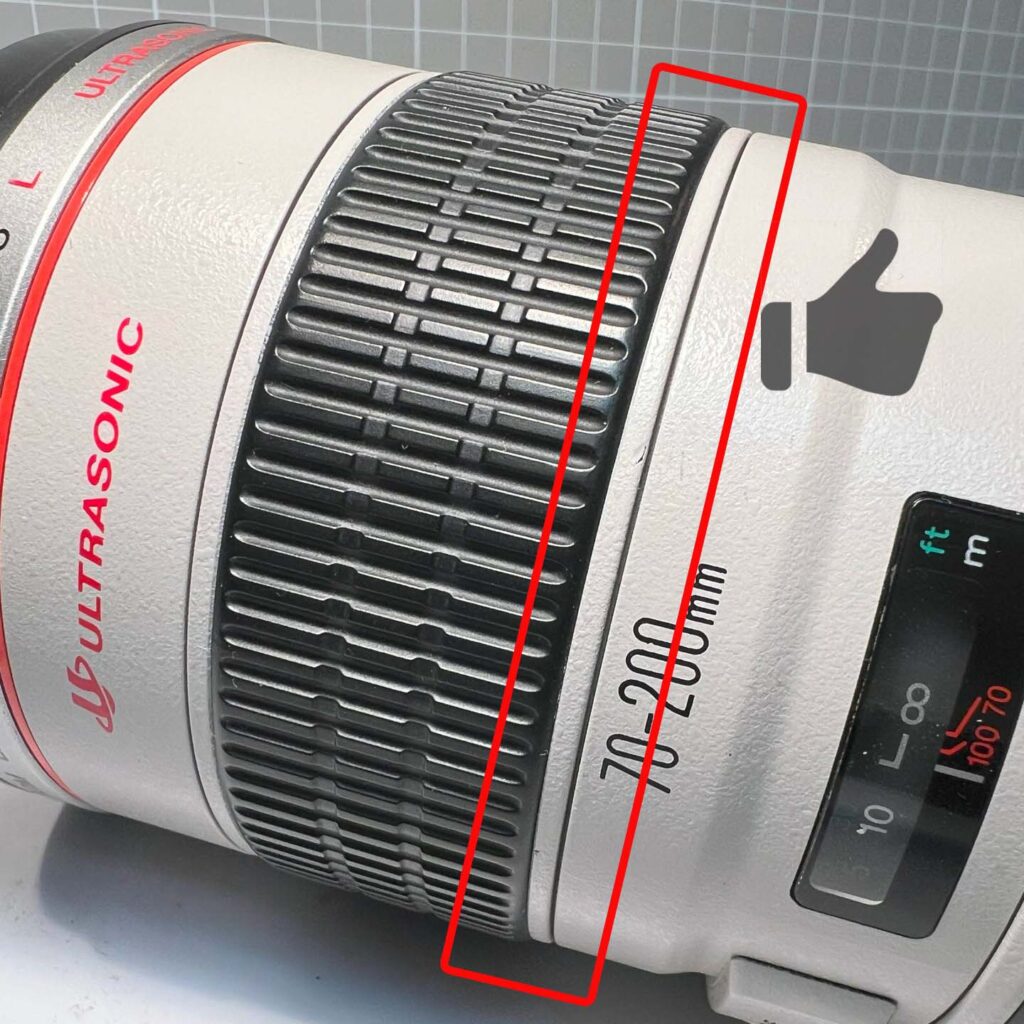
以上の作業によって、この画像の赤枠内のように、大きく空いていた隙間がしっかりと締まり、ガタつきも無く、マニュアルフォーカスも行い易くなった。
レンズ全体が引き締まった感じになり、不快な部分的なピントの甘さも無くなった。
古いレンズではあるが、自分自身はマニュアルフォーカス主体で使用しているので、電子制御などの不足を感じておらず、この優れたLレンズをまだまだ使い続けて行きたい。
これ程改善されるなら、もっと早くにメンテナンスを実行しておきたかったが、情報が足りず、素人にはこの作業の敷居が高かったのは確かだ。
その思いもあり、同じような症状で困っている方に少しでもお役に立てればと思い、このブログを投稿した。
もちろん、失敗の恐れも十分にあるため、このメンテナンスは万人にお勧めできることではなく、あくまでも自己責任の範疇にて行って頂きたいということを述べて、この投稿を終わりとします。